
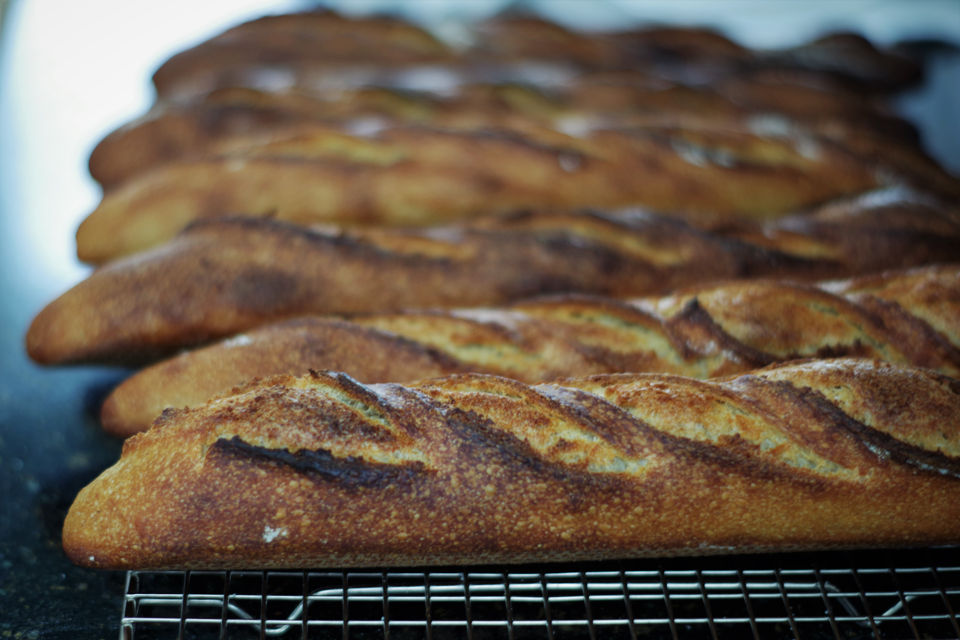
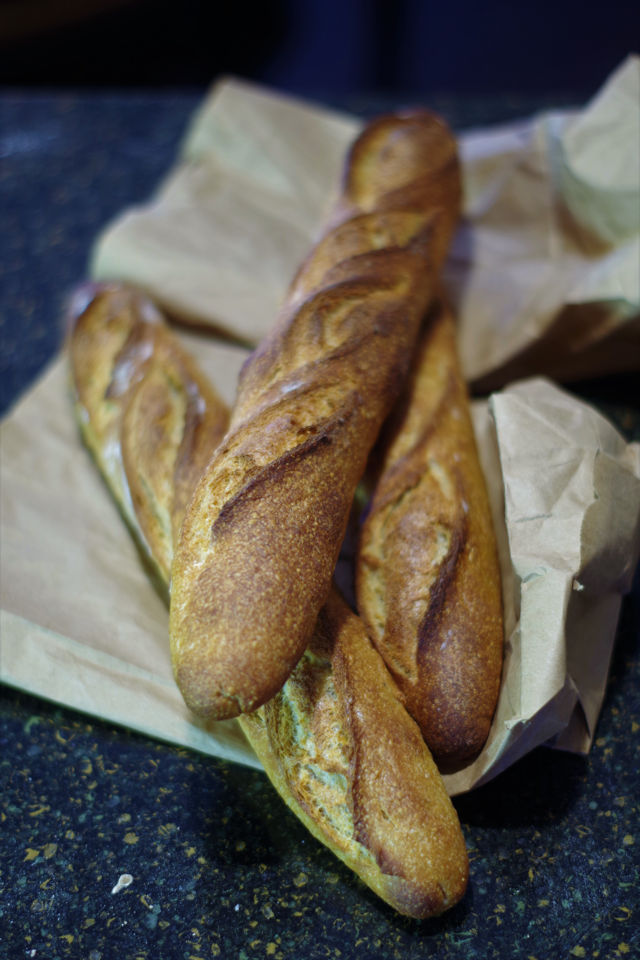
This is by far one of the most favorite breads in our household. The recipe yields 6 baguettes and 1 or 2 are gone within the first hour, after being taken out of the oven. Baguettes come out with a bit thicker crunchy crust, sweet and tender crumb. The smell and taste is so captivating, it is hard to put it away.
Kamut is an ancient grain and I was first introduced to it through breakfast cereals. For years my breakfast was consisting of simple steel rolled oat porridge mixed with cut fruits. Occasionally I substituted it with a steel rolled kamut, to bring in some variety. I can’t say I particularly liked it since it had a sour taste undertone, starling contrast to sweet tasting oats. Nevertheless after while I got used to it, best described it is an acquired taste.
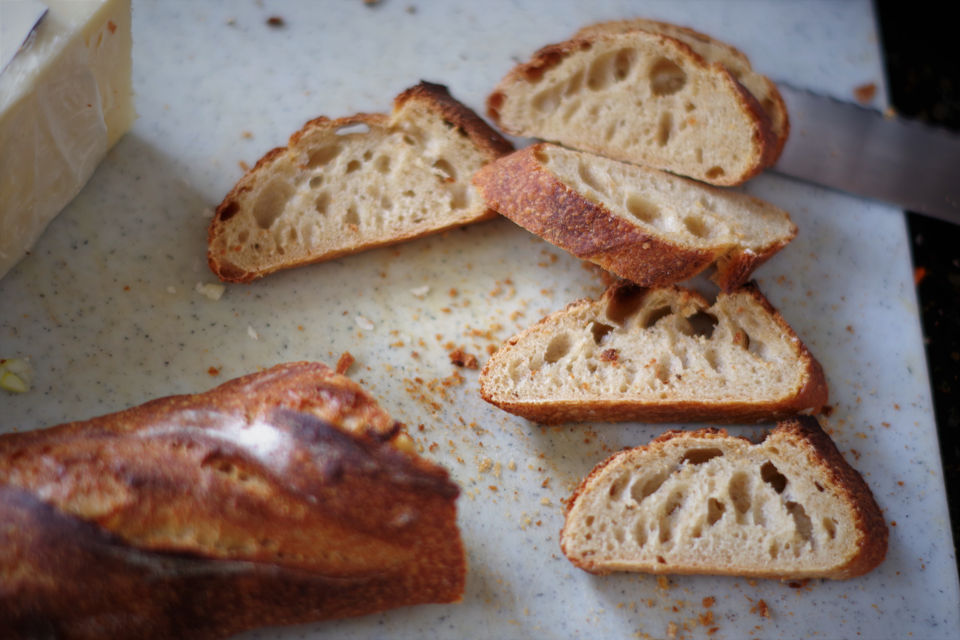
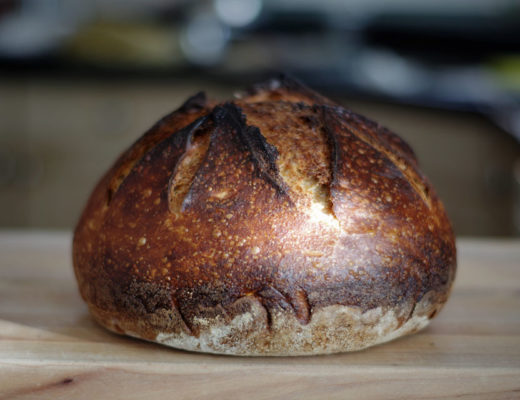
As I bake sourdough bread weekly, I prefer and am constantly looking for recipes that include the whole grains. Their grabbing baking aroma, dark crust and nutty flavor is what wins it over for me. This recipe is one of that variety, but with addition of kamut as described in my opening lines, it is a class of its own.
Being a sourdough bread and in order to develop a complex flavor profile it takes long fermentation times and therefore two days to bake it. This is a high hydration dough (84%) and depending on flour you use you might want to experiment by reducing 100-200 ml water from what the recipe is calling for. It takes a bit of practice and experience to produce the high hydration dough you are able to work with without getting frustrated along the way.
Any kneading technique can be applied for primary gluten development. I prefer French slap technique, for its ease and speed of dough development.
I baked 4 baguettes on a specialty fluted baguette baking tray and two on a baking stone, just to be able to fit them all in the oven and bake all at once. They all turned out great with little difference between tray and baking stone.
As usual some steam will be required at the initial part of baking time in order to prevent a premature crust from forming, that in turn would have impeded oven spring of the loafs. What I find to be the easiest way to generate the steam is to pre-warm a cast iron skillet placed on a lower oven rack, while the baking stone is kept on a rack in the middle of the oven. Just before start of baking and before closing the oven door I quickly pour 1 cup of boiling water in the skillet. This generates enough steam that is needed within the first 20 minutes of baking.
The recipe has been inspired by The Perfect Loaf blog.
")
| Prep Time | 30 minutes |
| Cook Time | 40 minutes |
| Passive Time | 30 hours |
| Servings |
baguettes
|
- 22 g liquid sourdough starter
- 22 g whole wheat flour
- 22 g white bread flour I used Boreal Organic All Purpose Non-bleached White Flour
- 22 g filtered water at room temperature
- 373 g kamut flour
- 565 g white bread flour I used Boreal Organic All Purpose Non-bleached White Flour
- 85 g whole wheat flour
- 864 g filtered water at 27ºC (80ºF)
- 3 g diastatic malt powder optional
- 25 g fine sea salt
- 85 g developed Stiff Levain
Ingredients
Stiff Levain
Dough
|
|
- 11:00 am In a small bowl mix together all ingredients and knead a soft ball. Cover and keep at 27ºC (80ºF) for 4 hours.
- 2:00 pm - Autolyse In a large mixing bowl, combine together flour and water until there is no dry bits left. Cover and let rest for 1 hour at 27ºC (80ºF).
- 3:00 pm - Mixing Tear up stiff levain in a small pieces and spread on top of the wet dough. Mix and pinch the dough until fully incorporated. Turn the dough onto non-floured counter and knead for 5-6 minutes or until the dough starts to become tight and shiny. Transfer the dough to the mixing bowl, cover with plastic film and let rest for 15 minutes.
- Turn the dough onto the counter and knead for another 2-5 minutes or until the dough becomes little tighter. See recipe notes.
- Transfer the dough to the mixing bowl, cover and keep at 28ºC (82ºF).
- 3:30 pm - 5:30 pm - Warm Bulk Fermentation After first 30 minutes perform the first stretch and fold and then two more sets spaced by 30 minutes each. After the last set, let the dough rest for the last 30 minutes of warm fermentation.
- 5:30 pm - 8:00 am - Cold Bulk Fermentation Cover the bowl tightly with plastic film and keep in the fridge.
- 8:00 - Divide and Preshape Turn the dough onto lightly floured counter. Lightly stretch the dough forming a rectangular shape. Grab the top (longer edge of a rectangle) and fold in 1/3 of the way. Rotate the dough 180º , grab and fold the other edge of the rectangle overlapping it. Make sure the dough did not stick to the counter, flour lightly if required and place it seam down onto the counter. *See recipe notes.
")
- Divide the dough into 6 equal parts.
")
- Take each cut dough section, place upside down (seam towards you) onto counter. Flatten the dough lightly with your palm into rectangular shape. Grab and fold to the middle left and right edge of the rectangle, pinch together. Grab the top of the rectangle and fold over towards you to the other lower edge, sealing it together. Move back and forth slightly creating surface tension in the dough cylinder. Put it seam down onto a floured kitchen towel and cover with floured plastic film.
- Repeat the same with other 5 dough pieces, let rest for 30-40 minutes.
- 8:30 - Shape Take preshaped dough and turn it upside down on a lightly floured counter. Flatten it lightly with your palm forming a long rectangle. Fold in to the middle, the top longer edge of the rectangle. Rotate the dough 180º, fold in to the middle the other edge of the rectangle. *See recipe notes.
")
- Now with the first fold of both edges completed you created a 50% narrower rectangle. Take again the top edge of this new rectangle and fold in to the middle again. This way you have created again narrower rectangle.
- Once again take the top edge of this last rectangle and fold it over to the bottom edge and seal it together. Roll each end of the dough, creating a cone shape and sealing the ends. Flour lightly and place it seam down onto rice floured kitchen towel.
- Repeat the same process with other 5 preshaped pieces.
- 8:45 am - 10:15 am - Proof Proof the dough at room temperature for about 1.5 hours. Use "poke" test to determine when ready for baking.
")
- 9:00 am Prewarm the oven to 260ºC (500ºF), rack in the middle with baking stone, rack at the bottom with cast iron pan.
- 10:45 am Transfer proofed baguettes to parchment paper and fluted baking pan, score baguettes. *See recipe notes.
")
- Slide parchment paper onto the baking stone and fluted baking pan onto the rack beside the stone. Pour 1 cup of boiling water into hot cast iron pan.
- Bake at 246ºC (475ºF) for 20 minutes.
- Remove cast iron pan from the oven and briefly vent the oven.
- Reduce temperature to 232ºC (450ºF) and bake another 15-20 minutes or until golden brown.
- Let cool on a cooling rack for at least 30 minutes to an hour.
")

No Comments