

I haven’t posted anything for quite some time. Don’t feel too good about it but balancing between my two big loves: art and cooking, is not easy. Painting and drawing is what preoccupied my time through the last several months. I had momentum and I was not about to do anything that would interrupt it. It was just one of those times when you just get into the groove and keep going without stopping, almost as if you stop, it will all disappear like a burst bubble. That was really good and I had a lots of fun. I plan to in similar manner, plow through the rest of the year.

Cooking? No I did not stop cooking. That would have been unforgivable sin. Through this time I made several amazing cakes and many great dishes. I also diligently photographed most of the recipes, but just could not manage to put it all in a post. The New Year is upon us and that is a time to review and reconsider our goals and desires for the new year. A new year resolution is a popular term used for this exercise. Looking at my ambitious but realistic schedule, I felt weekends should be the time designated primarily to blog. Today is Saturday January 13, and this is a recipe for a wonderful cake that I have been planing to make for a long time. It is called Medovik or translated, a Honey cake.
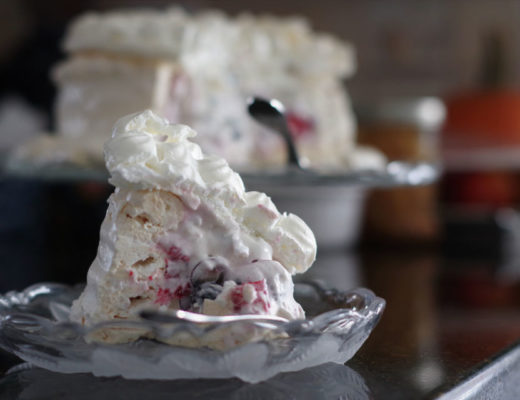
Medovik is a simple cake made out of a honey based sponge cake and a whipped crème fraîche filling. It is a light, soft and creamy cake that just begs you to have another piece. Medovik in different variations is widely popular in Russia and eastern Europe. It has a long history dating back to over 200 years. The legend is that the first Medovik was made for the wife of a Russian czar, Alexander I.

I made my Medovik for New Year’s Eve. We spent the night at home surrounded with family and friends. It was a great time and this was our dessert.
My take on Medovik: A simple cake with a sophisticated taste. The honey flavor comes through unmistakably. After few days, the sponge layers absorb some of the moisture from the filling resulting in a beautifully smooth but not soggy texture. All the flavors become amplified, turning this cake into a truly delightful desert.
Whipped crème fraîche or heavy sour cream is used for the cake filling. In Russia it is known as Smetana and it is national condiment. Sour cream is so popular there that just about anything is served with it : soups, salads, potatoes and as we see here also desserts. In Canada it is known as crème fraîche and is quite expensive. However, it is very easy to make. Just take heavy cream (35% B.F.) pour it in a glass jar, and add 2 tbsp of buttermilk or yogurt per cup of cream. Mix well, cover with cheesecloth and let it sit on a counter 24-48 hours, depending on the room temperature. I made mine with yogurt and had to wrap the jar in a blanket to aid the fermentation process since it is winter and nights are very cold. It turned out as expected, nicely thick and fluffy, with a discrete tangy flavor.

| Prep Time | 2-3 hours |
| Cook Time | 30 minutes |
| Passive Time | 1 hour |
| Servings |
pieces (2"x 2")
|
- 3 eggs
- 180 g butter 1.5 sticks equivalent
- 167 granulated sugar 3/4 cups equivalent
- 3 tbsp honey
- 2 tsp baking soda
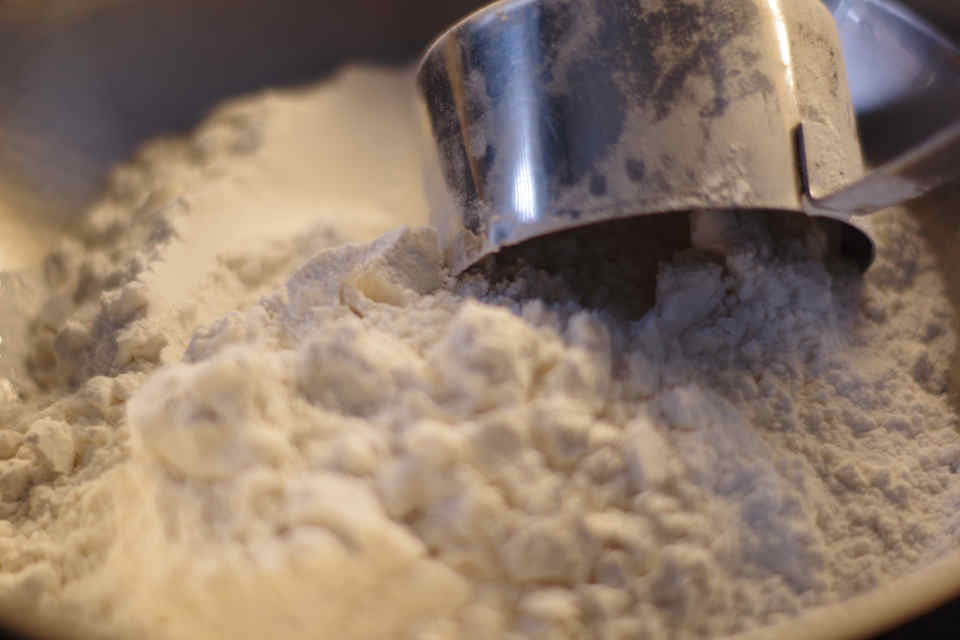
- 475 g all purpose flour 3 cups equivalent
- 1.5 l Creme Fraiche 6 cups equivalent
- 340 g granulated sugar 1 1/2 cup equivalent
Ingredients
Biscuit
Filling
|
|
- Cut out 7 pieces of parchment paper. Each sheet should be cut to roughly 38 x 30 cm (15" x 12").
- Using a black marker, draw a 30 x 24 cm (12" x 10") square on one of the sheets. Use tape to fasten the sheet to the counter. Cover it completely with plastic wrap film. The plastic wrap will adhere to the counter and create a smooth working surface. This will be your template to help you navigate how far to roll out each biscuit layer.

- Mix together eggs and sugar in a small saucepan. Use a double boiler to thicken the mix, whisking constantly.
- At the same time, warm up butter and honey in a medium size saucepan.
- Once thickened, use a hand mixer to aerate the egg mixture for few minutes until fluffy.
- Add the egg mixture to the medium saucepan with warm mixture of butter and honey. Mix well with hand mixer until fully incorporated while keeping the saucepan over a low heat.

- Remove the saucepan from the heat and start adding flour to the warm mixture. Add flour in small increments (I used 1/4 cup) and mix until incorporated. This is the most critical part of the biscuit dough making. The idea is to obtain a soft and workable dough. If too much flour is added, the dough becomes unworkable once it cools off. I know at this point it sounds intimidating but it is actually quite easy. Just keep adding flour until the dough is neither soupy nor sticky. I used a hand mixer and added flour until the mixer had difficulty working. At that point I transferred the dough quickly to the counter and worked it out, adding flour by hand. The dough is finished once it is compact enough that it can be rolled out. The dough will be smooth, soft, not sticky and very warm. I used about 2 cups of flour to obtain a satisfactory dough consistency. In your case, that might vary depending on the size of the eggs you used, how thick your egg mixture was at the end of the heating stage, and on the type of flour used.

- Divide the dough into 6 equal parts and put them in a large Ziploc bag to prevent drying out and cooling off.

- Preheat the oven to 180°C (355°F).
- Place a piece of the pre-cut parchment paper over the template. Quickly roll out the first biscuit layer. Roll the layer out in a rough square shape making sure it completely covers the square surface area marked on the template. It does not matter how neat it looks since edges will be trimmed later on. Work as fast as you can since the dough is the easiest to work with while it is still warm. Add flour as needed to prevent the dough sticking to the rolling pin.

- Repeat the same sequence with the 5 other layers. I suggest you do not start baking until all the layers are rolled out.
- Remove the template parchment paper and use scissors to cut the square along the marker lines. This square now will be used for a biscuit layer trimming.
- Bake each biscuit layer on the middle rack, using the back of a large baking pan for about 5 minutes or until golden.
- Use a wooden straight edge, sharp knife and template square to trim each biscuit layer right after is taken out from the oven, while it is hot. That is the time when it is soft and easy to cut. Save all the trimmings.

- Let all six layers cool off completely.
- Use a food processor to grind up all the trimmings.
- Pour the cold crème fraîche into a mixing bowl. Mix on high speed until soft peaks are formed, adding sugar along the way. Put it in the fridge to cool off for at least 1 hour.

- Put a dollop of crème fraîche in the middle of serving tray to "glue" and prevent the biscuit layer from sliding around. Place the first biscuit layer on the serving tray.
- Add about 250 ml (1 cup) of cold, whipped crème fraîche filling and spread evenly.

- Repeat the process with the other 5 biscuit layers. When filling the last layer, also cover the sides of the cake.
- Add the ground biscuit trimmings, covering the complete cake. Put the cake in the fridge and let it cool at least 24 hours before serving.
2 Comments
Sarita
September 26, 2018 at 4:20 amThe cake looks great – looking forward to making it!
Gordan
September 26, 2018 at 8:00 pmThat is great! Let me know how it turns out and feel free to ask any questions you might have about the recipe? I appreciate your feedback!