
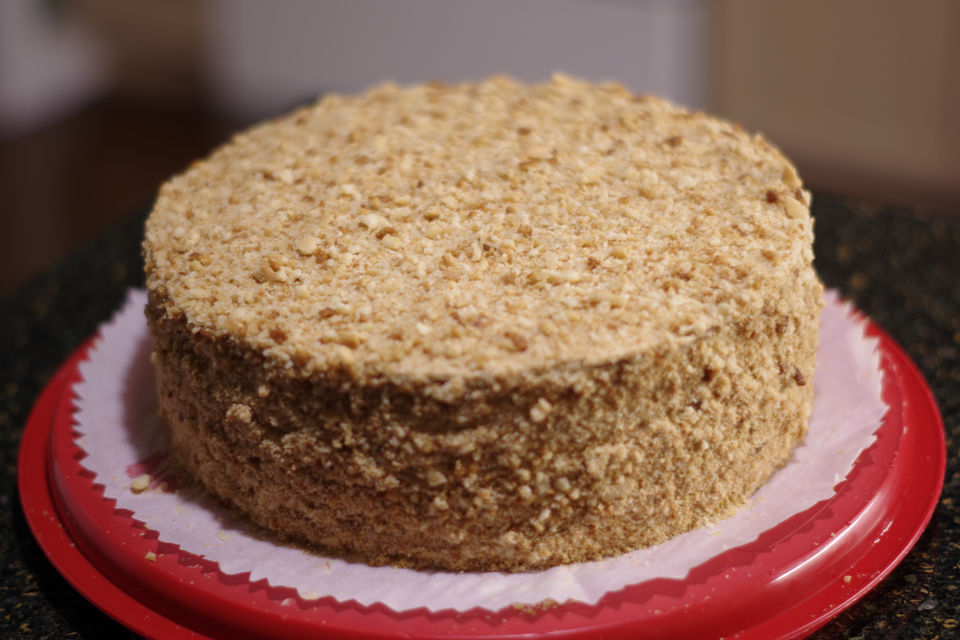
For this New Year’s eve I made Medovik, traditional Russian honey cake. I made it also last year but that was a different version of this famous cake. The primary difference was the filling which last year was based on crème fraîche or heavy sour cream. This year’s cake has a filling that can be best described as french buttercream flavored with dulce de leche or caramelized condensed milk.

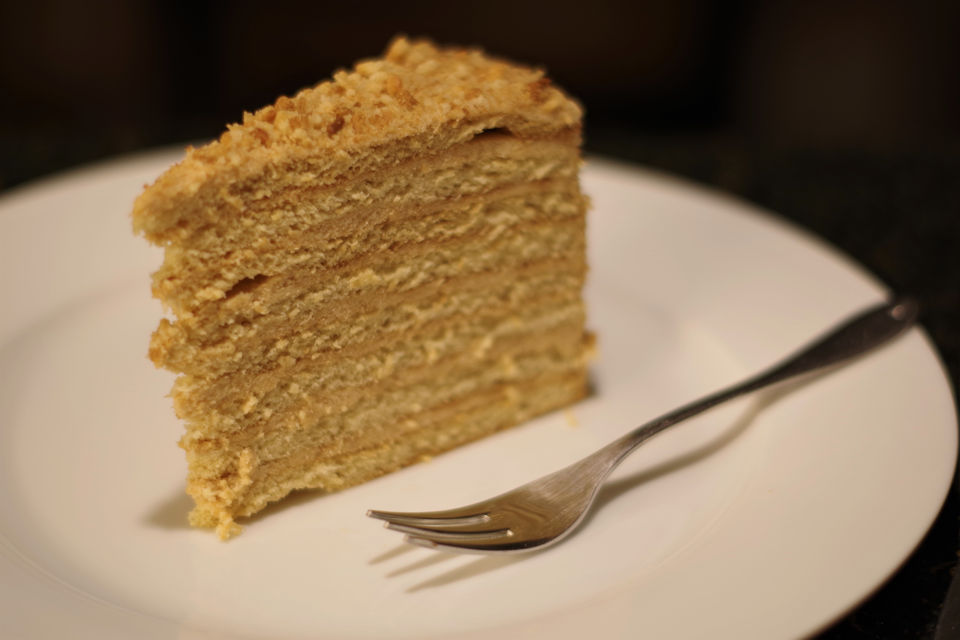
What to say but that I like each version in its own way. This cake has a beautiful honey smell and flavor although there are only 3 tbsp of honey in the recipe. French buttercream with dulce de leche provides the cake with a truly lush mouthfeel.
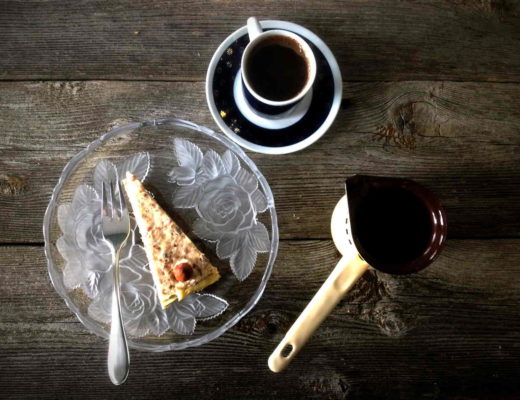
The cake was a first item served after midnight, in the new year. We had it along with tea and coffee. It was funny how everybody suddenly went quiet as they were enjoying there piece with satisfaction.
I would like to emphasize that the cake is at its best when made couple of days ahead of time, as that will allow the filling to infuse the cake layers, and flavors to blend together. After this, the spoon will cut through the cake layers smoothly and with ease.

The recipe is adapted from a food blog “Russian Monday – Cooking Melangery“.

| Prep Time | 2 hours |
| Cook Time | 45 minutes |
| Servings |
servings
|
- 500 g all purpose non bleached flour
- 200 g granulated sugar
- 3 eggs
- 110 g unsalted butter tempered to room temperature
- 2 tbsp honey
- 1 1/2 tsp baking soda
- 500 ml milk
- 3 eggs
- 4 tbsp corn starch
- 240 ml dulce de leche
- 1 tbsp honey
- 220 g unsalted butter tempered to room temperature
Ingredients
Biscuit Layers
Filling
|
|
- With rack placed in the middle, preheat the oven to 190 ºC (375 ºF). Place a baking pan that is turned upside down, on the rack.
- Whisk eggs together and set aside.
- Melt together butter and honey in a double boiler over simmering water. Whisk in the sugar. Make sure that the mixing bowl is a medium size since the mix volume will nearly double by the end.
- Slowly add eggs, whisking constantly until they are fully incorporated. Cook for another 3-4 minutes and keep whisking constantly.
- Add baking soda, whisk and cook for one more minute. The volume of the mix will approximately double.
- Take off the heat and using a wooden spoon, mix in flour by adding it a little at a time.
- Turn the dough onto a lightly floured counter and briefly knead until you get a uniform, compact and warm dough.
- Divide the dough into 8 equal sized pieces. Shape each piece into a ball and cover with plastic wrap to prevent drying.

- Roll out the first dough ball onto a piece of parchment paper in a shape with area larger than bottom of 22.5 cm (9" ) springform pan. The rolled dough will be paper thin and you will use a springform bottom as a template. Cut the dough around the template by using a pizza cutter. Separate trimmings from the round layer, to prevent them from sticking together as they are baked.

- Using a peel transfer a parchment paper to the oven and bake for 3 minutes.

- During baking time you can roll out and cut out the second dough layer. Repeat the sequence until you baked all 8 layers. Let everything cool completely.

- Use a food processor to make crumbs from baked layer trimmings. Transfer crumbs in a small container, set aside.

- In a separate small bowl whisk together 1/3 of milk recipe amount and eggs. Sift in a corn starch, whisk until it is fully dissolved and mixture is smooth.
- Pour the remaining milk in a small sauce pan, heat up over medium heat (5 out of 10) to about 60 ºC (140 ºF). Do not boil!
- Slowly add in egg mixture, whisking constantly bring it to simmer and until it becomes very thick. Remove from heat and let it cool. Whisk occasionally to prevent skin forming.
- Stir in butter and dulce de leche.
- Top each biscuit layer with approximately 1/2 cup of filling cream. Spread the reminder of cream coating the side of the cake.

- Sprinkle biscuit crumbs on top of the cake and using an offset spatula add the crumbs to the side of the cake.
- Refrigerate cake for at least 8 hours (couple of days is even better) before serving.

No Comments