

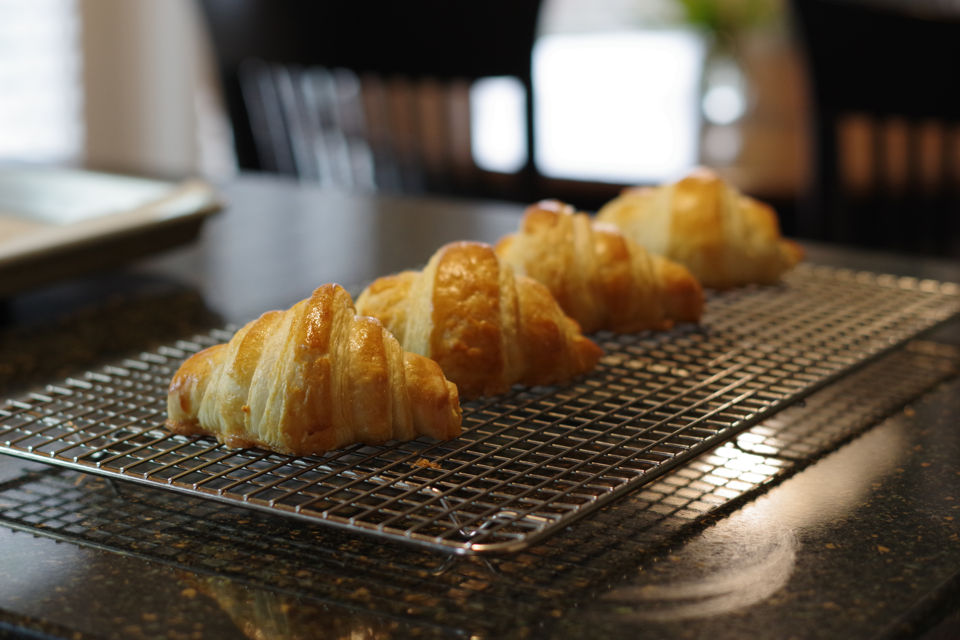
Warm, freshly baked croissant paired with a good cup of cappuccino is my image of a perfect start to a day! Nothing beats that beautiful buttery smell and flavour, crispy texture and all washed down with a creamy and smooth cappuccino. There, I said it!
I think I had my first croissant experience during my first trip to Paris, back in my student days in the late eighties. That trip was something to remember. It was my last year at university and as was customary at the time; the whole group or generation of last year students went together on a trip. We packed the bus and went on a 10 day road trip, visiting some great historic cities throughout western Europe, Paris being one of them. We stayed at some small and cozy hotel located at Montmartre, just by the stairs leading to Sacré-Coeur Basilica. The croissant with coffee was served for breakfast and that image is still engrained in my memory.


Good baked goods and especially pastries are not that easy to find these days. There is a French bakery in town and I occasionally buy their almond croissant which is ok, but nothing exceptional. Artisanal pastries tend to be more expensive which I don’t mind, but likely it is tough competition with a 2kg pumpkin pie sold for $6.99 at the local retail chain.
Now why would you want to learn how to bake the croissant all by yourself? There are many reasons, from cost cutting to having an authentic and tasty product that you can’t get anywhere else. To me as an individual with one of my main personal traits being infinitely curious, this naturally lands itself as a no brainer! It is so liberating and deeply satisfying to understand and know how to make anything by yourself in your daily life. Food is the key to our life and being able to handle as many aspects of it as you can on your own, is an important skill that also brings a sense of accomplishment and adds more meaning to your life.
Cost-wise, baking the croissant on my own is less than 1/10 of the purchasing price in a specialized bakery, and by the way that is the only valid comparison. The less expensive, rubbery and bready product found in almost all chain stores and coffee shops does not compare. It just looks like it has the shape of a croissant, but that’s about it.


The recipe presented here is an authentic French recipe adopted from a pastry chef Bruno Albouze. The results are incredibly good and tasty croissants, likely some of the best you ever tasted! Even if you don’t manage to bake the most aesthetically pleasing pastry the taste will still be there! Of course the aesthetics is important, but that is a whole different level and as always takes more practice! Maybe bake 2-3 batches one after the other (I did) and freeze them. That will get you some good practice and unbaked croissants can be kept in the freezer for up to 3 weeks.

What can I say to put you fears at ease and entice you to try baking your own croissant?
Look, for starters there are no trick moves nor secret ingredients. It is actually easy to understand the chain of process activities that you have to follow and you will arrive to your goal! To sum up some of the key items:
- Required equipment: kitchen scale, instant read thermometer, baking pans, medium size mixing bowls, rolling pin, 6″x 6″ zip lock bag, parchment paper, stretch wrap.
- Before anything else calculate the required water temperature, please refer to the notes below the recipe.
- Use wheat flour with at least 12% gluten and good quality non salted butter.
- The kitchen temperature should be not higher then about 21ºC (the lower the better) which will make it easier to work with the dough.
- You need to have a sufficient space in the fridge to be able to keep the dough as cold as possible during the process.
The rest is in the recipe, just carefully follow one step at a time and I have no doubt that you will bake an incredibly tasting croissant! Happy baking!


| Prep Time | 20 minutes |
| Cook Time | 18 minutes |
| Passive Time | 5 hours |
| Servings |
croissants
|
- 500 g unbleached bread flour min 12% protein
- 250 g filtered water at calculated and adjusted temperature
- 15 g instant yeast
- 50 g granulated sugar
- 12 g fine sea salt
- 100 g unsalted butter softened, tempered to room temperature
- 250 g unsalted butter softened, tempered to room temperature
- 1 egg
- 2 egg yolks
- 1 pinch fine sea salt
Ingredients
Dough
Tourage
Egg Wash
|
|
- In a medium size mixing bowl combine flour, sugar, instant yeast and salt.
- In a small bowl add water and adjust the temperature to calculated value for DDT (see notes below).
- Add water to the mixing bowl with flour mixture and mix together using your hand.
- Incorporate softened butter into the mixture.
- Once you have a compact and shaggy dough (no dry spots of flour) turn the dough on a clean counter and knead by using the fraisage kneading method. Knead for about 15 minutes or until window pane test confirms proper gluten development. Your final dough temperature should be around 25ºC (77ºF).

- Shape the dough into a ball and transfer into a lightly oiled bowl, cover tightly with plastic wrap and keep at 24ºC (75ºF) for 2 hours or until doubled in size. I do this step by keeping the dough in the oven together with small saucepan with hot water to maintain the desired temperature.

- Turn the dough on a lightly floured counter and deflate. Slap and flatten the dough with the palms of your hands and form a rectangular shape. Fold in 1/3 of the dough length from the left followed by the 1/3 fold from the right and creating business letter like folded shape.

- Fold the top edge to the middle following from the bottom edge sealed in the middle.
- Wrap the dough tightly in a plastic wrap and refrigerate overnight.
- Add soften butter into a 15 x 15 cm (6"x6") zip lock sandwich bag. Using a rolling pin gently roll out and flatten the butter slab making it evenly thick and completely filling the bag. Leave in the fridge overnight.

- Take the butter out of the fridge and use sharp knife and cutting board to cut all 4 zip lock bag edges. Remove the top plastic piece and set the butter slab aside at room temperature to soften up. The idea is to obtain the same consistency butter texture as the cool dough in order to facilitate proper laminating. The butter is ready when you can create a dimple by lightly pressing by your finger tip. At room temperature of 22ºC it takes about 1 hour to reach that state.

- Take the dough out of the fridge, unwrap and put on lightly floured counter. Using a rolling pin roll out the dough to approximately 15cm x 33 cm (6" x 13") rectangle.

- Lay the butter slab upside down on the top of the rectangle, remove the bottom plastic piece.
- Fold the other end of the rectangle over the top of the butter slab, sandwiching it in between.

- On a floured counter roll out the dough starting from the middle, folded dough edge on your right. Roll out the dough to rectangle 60cm x 20cm (24" x 8"). Flour the counter and the dough as required to prevent sticking.

- Brush off any excess flour from the top of the rolled out dough. Fold the left side (folding by length) about 2/3 following with the 1/3 fold on the right side, the folded edges touching.

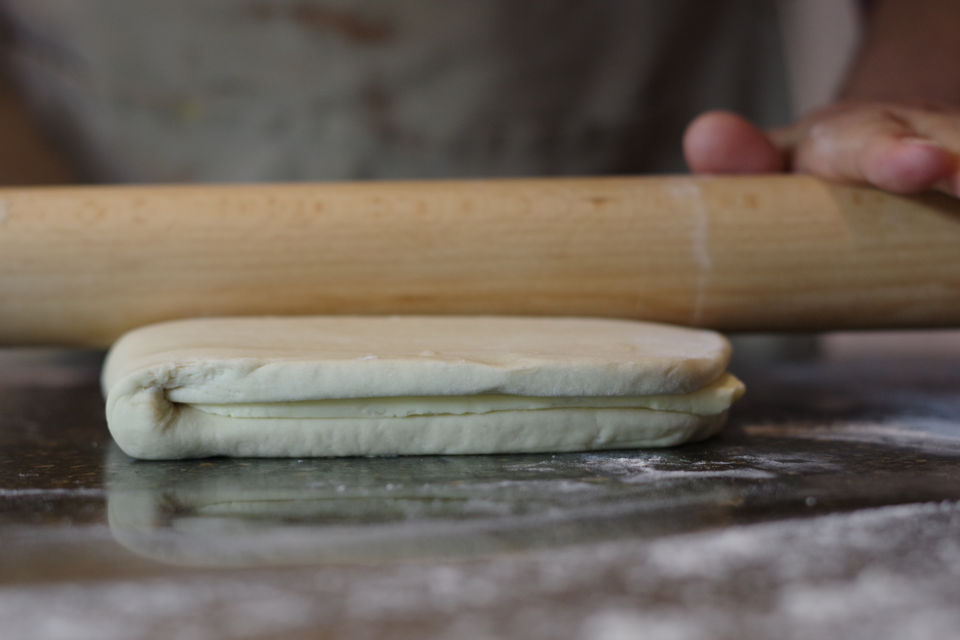
- Use rolling pin to roll out the dough and adjust the thickness of the folded dough, just to make it even thickness.

- Fold the dough in half, by length creating book like shape. Again use a rolling pin to even the dough slab thickness.

- Place the dough on a parchment paper lined tray or baking pan, cover with plastic wrap and refrigerate for 1 hour.
- On a floured counter roll out the dough (by length) to a rectangle 60cm x 20cm (24" x 8").

- Brush off any excess flour from the top of the rolled out dough. Fold the left side (folding by length) 1/3 of the dough and overlap it with 1/3 fold from the right, business letter like fold. Again use a rolling pin to even the dough slab thickness.

- Place the dough on a parchment paper lined tray or baking pan, cover with plastic wrap and refrigerate for 1 hour.
- Use a stick blender and make an egg wash, set aside.
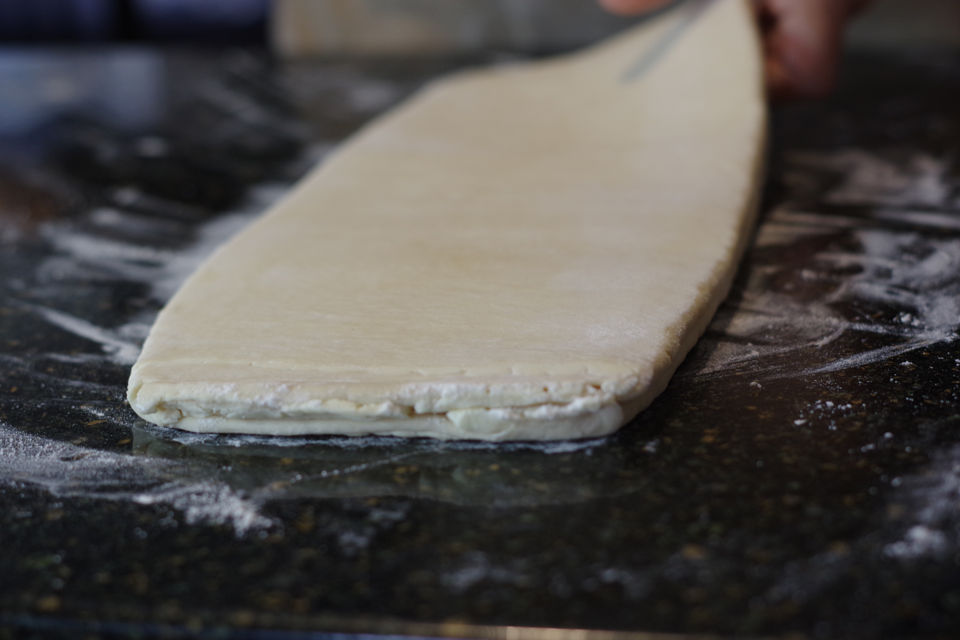
- On a floured counter roll out the dough to a rectangle 23cm x 70 cm (9" x 28").

- Cut the dough in 12 to 14 triangles which at the end will provide 80-90g croissants. The easiest way to do it is to cut seven 10 cm (4") wide rectangles and then cut diagonally each of these rectangles to make 2 triangles. Do complete one set at the time before proceeding to the next rectangle cut.

- Make a short 1 cm ( 0.5") incision cut in the middle of the short side of each triangle.
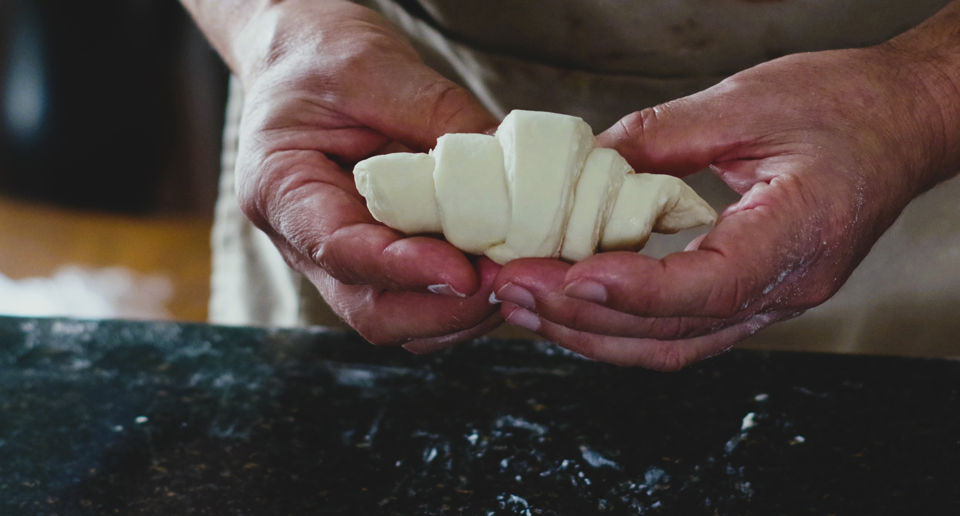
- Lay the triangle in front of you on a clean counter, long tip pointing towards you. Press the tip of the triangle sealing it to the counter, this will provide you with more control.
- Grab the each corner of the top of the triangle, fold each one in, press and seal the edges. The each side will look like a small cylinder divided by incision cut made little earlier. Lay your palms of the each hand flat over these cylinders and by simultaneously pressing down slide your hands towards you and roll the whole triangle into a croissant cylinder. Set it on a parchment paper lined baking sheet by placing the croissant seam or tip of the rolled triangle at the bottom.

- Repeat the same with the rest of dough triangles.
- Using a pastry brush, egg wash all the croissants. If you plan to bake croissants the same day set aside and proof uncovered at room temperature for 2.5 - 3 hours or until they double in size, look puffy and spongy. Note: Alternatively put the baking sheet uncovered in a freezer for 24 hours. Store the frozen croissants in a large zip lock bag and use within 3 weeks. Take the croissants from freezer the night before baking, put on a parchment paper lined baking sheet and let thaw out overnight, uncovered in the refrigerator. In the morning take the baking sheet out of refrigerator and proof uncovered at room temperature for 2.5 - 3 hours or until doubled in size.
- Using a pastry brush once again egg wash puffed up croissants right before baking.

- Preheat the oven, rack in the middle: - Conventional oven: 200ºC(400ºF) bake for 10 minutes, reduce heat to 190ºC (375ºF) and bake for another 12-15 minutes. - Convection oven (fan is on): 190ºC(375ºF) and bake for about 18 minutes.
- Remove croissants from the baking sheet and let cool on a cooling rack. Croissants are best when enjoyed 30 minutes after baking.

Desired Dough Temperature (DDT) - the dough temperature that will result with consistent baking results (flavour and bread rise). For a wheat based yeast doughs DDT= 25ºC.
Desired Dough Temperature Formula - provides the means to calculate the factors that influence the dough temperature, with one of the factors being water temperature (the only factor we can easily control).
Total Temperature Factor (TTF) - the average temperature of all components involved in dough making :
- (RT) Room temperature
- (IT) Ingredient temperature
- (WT) Water temperature
(RT+IT+WT)/3=TTF
Friction Factor (f) - the heat added to the dough through kneading or mixing. This factor varies for different doughs and mixers used, but for our purposes and this dough it is 6ºC for either manual kneading or use of stand mixer.
TTF+f=DDT
(RT+IT+WT)/3+f=DDT
RT+IT+WT=3x(DDT-f)
WT=3x(DDT-f)-RT-IT - formula for calculating the water temperature
Example:
- (RT) Room temperature: 22ºC
- (IT) Ingredient temperature: 22ºC
- (DDT) Desired dough temperature: 25ºC
- (f) Temperature gained by friction: 6º
WT=3x(25ºC-6ºC)-22ºC-22ºC=13ºC

No Comments