
Baking bread is a regular weekly routine in our household. Sometimes that is more than once a week, but normally one loaf gets us through the week just fine.
Why do I bake the bread and why I simply don’t buy it in the store or a bakery? Does it take lot of time that I could productively use elsewhere? Those are just some of the questions that one could pose.
First of all, I am a huge fan of a good quality and tasty food products. Next, I like to learn and know about many things and that includes cooking and baking. Making it by myself provides me with huge sense of accomplishment and personal pride. That all leads me to the answer to two hypothetical questions:
1. The bread I make at home is unlike anything that can be bought locally where I live.
2. If planned properly, baking bread is easily scheduled around other daily activities. It is not one long labouring task, but rather bunch of short tasks, organized in a particular time sequence.
Most of the time I make sourdough based breads. For that, I cultivate 100% hydration sourdough starter that sits on a kitchen counter and is refreshed daily. That way it is always kept healthy and at full strength, ready for use at any time.
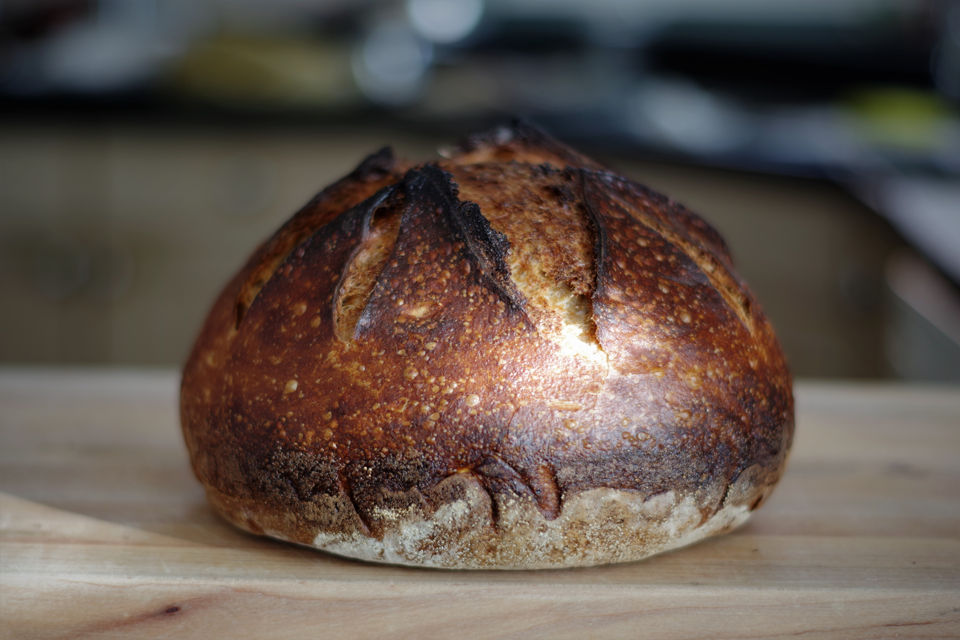
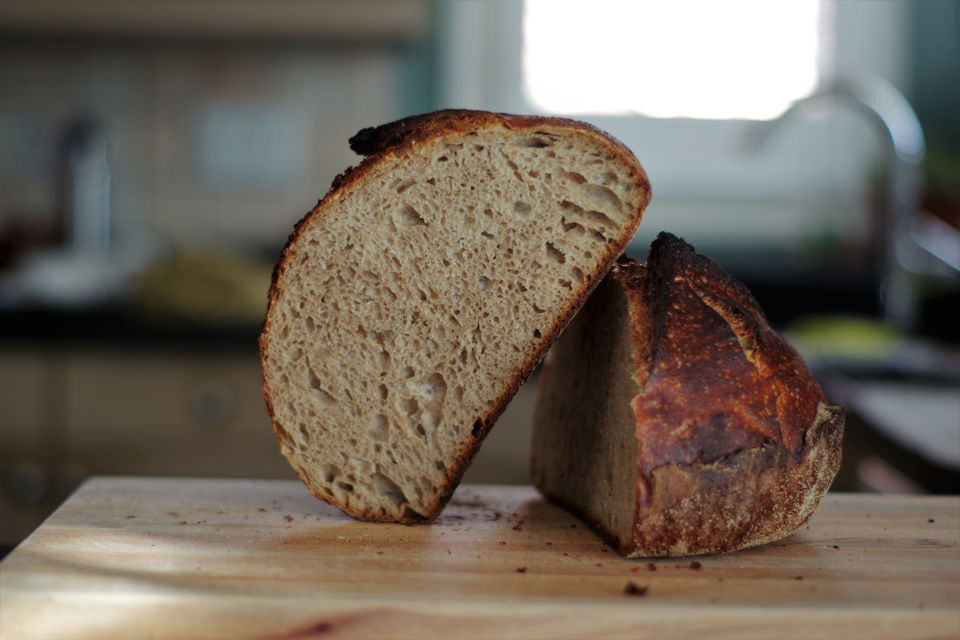
I prefer a sourdough for its health benefits, crisp crust and chewy crumb. To name a few health benefits: it has a low glycemic index; long sourdough fermentation brakes down the phytic acid that typically causes indigestion problems.
Whole wheat is my next preference, again primarily due to health benefits provided by this nutrient rich flour. I also like a beautiful nutty aroma that it provides to the bake. However, there are some difficulties that limit amount of the whole wheat flour that can be used. Bread made out of only a whole wheat flour has a tendency to be dense, have a fine crumb and a small rise. The culprit is a bran whose sharp edges simply cut through the gluten strands and thus prevent creation of gluten network that would trap carbon dioxide released by the yeast.
To avoid this problem the whole wheat is usually mixed with white flour, in various ratios. 50% is a ratio for this recipe, and for me that is the highest I have gone so far.
I used Boreal Milanaise organic all purpose white flour with 11.9% protein content and whole wheat hard flour from our local Arva Mill.
The recipe is 85% hydration due to high whole wheat flour content but depending on flours you use, that can vary substantially. With other types of white flour that I used in the past I had to go as low as 75% hydration because above that level the dough became too sloppy and unworkable. Some experimentation is required when doing it the first time, I suggest starting with about 75% hydration and working your way up from there.

My recipe is inspired by this recipe and I just adjusted ingredients amounts to suit my Dutch oven baking dish size.
It takes two days to make this bread, but 90% of work is done on the first day. The second day is just baking and enjoying it!
The general concept is as follows: mix and develop the dough on the day 1; cold proof overnight in the fridge; bake the next morning. It is not a hard work but as I said it requires some planning and good will to do it.
Below I explained in detail each of these steps including a time schedule for each step. Happy baking!
")
| Prep Time | 40 minutes |
| Cook Time | 1 hour |
| Passive Time | 20 hours |
| Servings |
boule
|
- 360 g all purpose non bleached flour
- 68 g spelt flour
- 292 g whole wheat
- 540 g water 32ºC (90ºF)
- 16 g fine sea salt
- 102 g liquid levain
- 7 g diastatic malt powder
- 50 g mature sourdough starter 100% hydration
- 50 g filtered water 32ºC (90ºF)
- 25 g all purpose non bleached flour
- 25 g whole wheat flour
Ingredients
Sourdough Bread (50/50)
Liquid Levain
|
|
- In a small mixing bowl incorporate all the ingredients, cover with plastic wrap and keep at 26ºC (80ºF).
- In a medium size mixing bowl stir together flour, water and diastatic malt powder. Cover with plastic wrap and keep at 26ºC (80ºF).
- Pinch and knead Liquid Levain into the dough mixture making sure it is completely unified. Using a "slap and fold" method work the dough out until it starts to look shiny, about 4 minutes.
- Add the salt and knead it into the dough.
- Transfer the worked out dough to a thick walled bowl, cover with plastic wrap. Let it ferment at 26ºC (80ºF) for approximately 3 1/2 hours. Keep an eye on the dough as you may have to shorten or extend the fermentation time depending on rise (see recipe note). Perform 5 "stretch and folds", one every 30 minutes from the start of fermentation. After 5th stretch and fold let the dough rise for the reminder of the fermenting time.
")
- On a lightly dusted counter pre-shape the dough. Consider this step as a dough shaping rehearsal before its final shaping. The most importantly do it confidently and quickly. Turn the smooth side of the shaped boule to the top, cover with plastic wrap and let rest on the counter for 20 minutes.
")
- Prepare a round proofing bread basket lined with a smooth cotton or a canvas liner. I used kitchen towels lightly dusted with rice flour to prevent dough from sticking.
- Turn the boule smooth side down and perform a final shaping using exactly the same technique as in pre-shaping.
- Turn the boule smooth side up again, enclose with your hands and gently drag across the counter. The friction created between the dough and the counter surface will tighten the boule skin. Use your pinkie fingers to pinch the dough at the bottom and keep the skin tight.
")
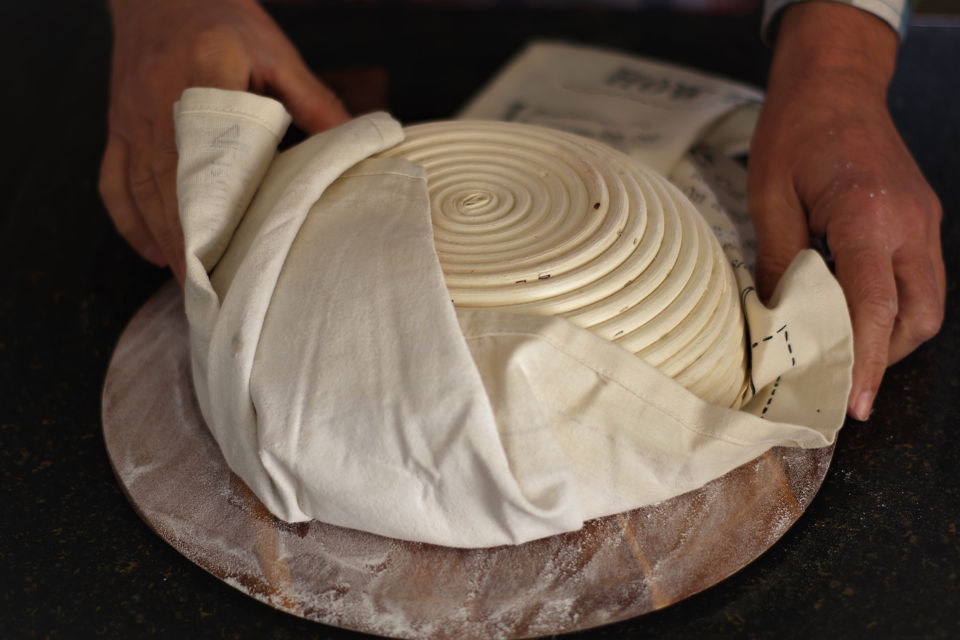
- Transfer the boule, smooth side down to the proofing basket, cover the basket with another kitchen towel. Put all together in a plastic bag and seal completely, refrigerate overnight.
- Preheat the oven with cast iron baking dish (Dutch Oven) at 260ºC (500ºF).
- Take basked out of the fridge, sprinkle some semolina onto the proofed dough. Invert the basket onto a dusted peel. Using a razor blade or a sharp knife confidently score the top of the dough. Make cut at straight 90º angle but don't go too deep.
")
- Transfer the dough to the hot Dutch Oven, put a lid on and bake for 45 minutes at 260ºC (500ºF).
- Reduce the heat to 232ºC (450ºF), remove the lid from Dutch Oven and bake for another 10 minutes.
- Remove from the oven and cool off on a wire rack for a minimum 2 hours.
- the dough finished fermentation cycle as it about doubled its volume, its top is domed, curved around the edges where it meets the bowl.

2 Comments
Courtney
July 6, 2020 at 9:41 pmThank you for this recipe! I made my very first sourdough loaf today and it tasted amazing!
Gordan
July 6, 2020 at 10:25 pmYou very welcome Courtney! I am very happy for you that you took on a challenge of baking your own sourdough and that it turned out well!