
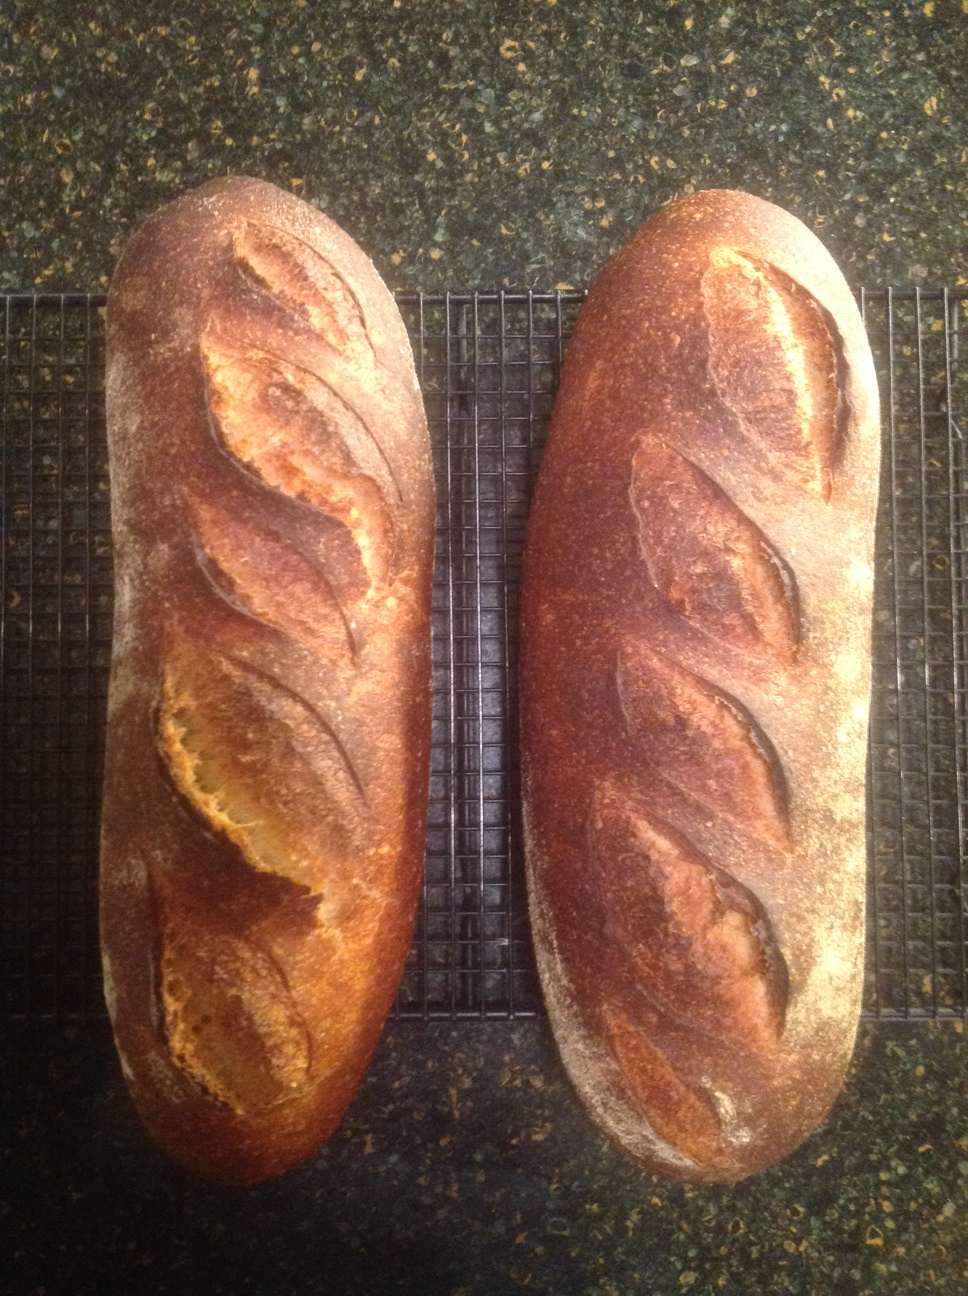
Sourdough bread
Sourdough breads have a lovely aroma and tangy, nutty flavor. They are ancient and simple to make. In terms of health benefits sourdough is a clear winner.
The benefits are abundant, but to name a few:
- Easier digestion due to gluten protein being broken in amino acids
- Predigesting of starches by bacteria-yeast combination, produced lactic acid which neutralizes anti-nutrient phytic acid
- Produced acetic acid inhibits growth of mold, acting as a natural preservative
The flavor, that is something easy to remember, is what will make you want another piece.
When it comes to bread baking, sourdough is something I make almost exclusively. I love the flavor and aromatic smell. It does not get moldy; the longest I kept it was 9 days. I find it very tasty even this old, especially if warmed up for a few minutes in the oven or if it is toasted.
To make sourdough bread, you will need to make your own fermented sourdough starter. Don’t be intimidated; a mixture of flour and water is all what is to it. The rest is in the hands of Mother Nature.
Sourdough starter
Now how does this work, what is a sourdough starter and how is it created?
Generally to make bread, you need flour, water, salt and leaven. Leaven is a substance that will make bread rise. There are few choices for bread leavening: baking soda, commercially produced yeast or sourdough fermented starter.
A sourdough starter is an eco-system of beneficial organisms: wild yeast and Lactobacilli bacteria. These microorganisms are everywhere around us: in the air, on our hands and in grain flour. They feed on simple sugars found in the flour.
As a by-product, wild yeast produces carbon dioxide, ethanol (alcohol) and acetic acid.
The by-product of Lactobacilli bacteria are lactic acid, ethanol and to a smaller degree carbon dioxide.
Carbon dioxide is what will leaven the dough while the right ratio among lactic acid, acetic acid and ethanol will give the bread a wonderful sour flavor.
Now depending on type of flour you use and proportion of water added, the mixture will produce different starters. Some of them will be more on the soft, paste like side while others will be stiff dough starters.
Each starter is one of a kind and gives unique flavor to the bread depending on bacteria-yeast combination that inhibits the starter. A starter is a living thing that needs to be cared for; periodically fed with flour and water, and kept in the fridge. Properly cared for starters can last virtually forever and can be kept for generations.
In my baking, I have been using two starters: whole rye and a whole rye/unbleached bread flour starter.
- The rye starter is a paste like starter, easier to make but needs to be refreshed once a week.
- The rye/unbleached bread starter is a stiff dough starter that can be kept in the fridge for weeks or months without refreshing.
Once you want to use one or another, you have to refresh it to bring it up to full strength, before it’s used for baking.
The following instructions are related to developing a whole grain rye starter:
You will need a digital scale, dark rye flour, filtered water and a 500ml glass jar. Why rye flour? Rye flour naturally contains large populations of sourdough yeast and bacteria, and as previously mentioned, this micro-flora is what needs to be propagated to a high concentration. It will take about 7 days to develop fully active starter. How fast a starter develops will depend mostly on the room temperature. Once it is fully developed, it is strong enough to raise the bread. The starter is stored in the fridge and needs to be refreshed from time to time. Generally at least once per week or any time you use it.
")
| Prep Time | 2 hours |
| Passive Time | 7 days |
| Servings |
|
|
|
- Day 1 – Take a clean 500 ml jar and mix 40g of dark rye flour and 40g non chlorinated water. I use tap water passed through a Brita filter. Mix it well until a paste-like consistency is achieved. Close the jar lid loosely and let it stand for 24 hours, at room temperature, out of direct sunlight. Make a mark with a marker on the side of the jar, indicating the mixture’s level.
- Day 2 – If everything goes well, you should see some bubbles forming at this time. Add 30g of dark rye flour and 30g of water and mix well with a clean spoon. Close the jar lid loosely and let it sit on the counter for another 24 hours.

- Day 3 – By this time you should see more activity and your mixture could even double, from original volume, as indicated by the mark on the side of the jar. If it did double, discard about 2/3 of the mixture and add 30g of whole grain rye flour and 30g of water. Mix well until the paste- like mixture is formed. Close the jar lid loosely and let it sit for 24 hours. If the mixture does not appear to be active yet /did not increase in volume, discard ½ of the mixture and repeat directions from Day 2.
- Day 4 – By now your starter should be active and should have doubled or tripled in volume over the last 24 hours. If that is the case, discard 2/3 of the mixture, adding 30g of whole rye flour, and 30g of water. Mix well to a paste-like consistency. Close the jar lid loosely and let sit for 24 hours.

- Day 5 – Your starter has to consistently triple in volume before it is ready for bread baking. If that is not the case, keep repeating the step described under Day 4.
It may take another few days of refreshing, but after a week you should have a starter that easy triples in volume over 12-24 hour period, and have a nice fruity smell. At that point, you can use it for baking or store it in the fridge.
2 Comments
Sarah Lu
April 15, 2017 at 8:34 pmHello,
I’m currently university student and I noticed that although the food looks absolutely delicious, they may take a long time for a busy student to make. I was wondering if you have any recipes that are short, quick, and easy to make other than the usual pasta or sandwich.
Thanks
Gordan
April 21, 2017 at 10:12 pmHi Sarah,
Thank you for your message. I have a daughter who, like you, is also a student. I know she faces similar challenges when it comes to daily food preparation. There are many delicious recipes that don’t really require a long time for preparation and I will be posting some very soon, so be sure to check back in. All the best!
Gordan