
Panettone, a pastry or a sweet bread, whichever term defines it more accurately, is one of a kind delicacy that I have been in love ever since I tasted it the first time. In Canada, typically it can be found around Christmas season. It is usually displayed in a beautiful decorative packaging, a festive feature which certainly gets it a deserved attention. Above all, it is Panettone’s captivating taste and aroma that brings you back, again and again. Although this Italian confectionery staple belongs to Christmas time sweets variety, there is no reason why not make it whenever you miss its airy, soft texture and fruity fragrance. On that note, this is my second Panettone recipe attempt and, I was really looking forward to the challenge.
Let me say it up front: this is not a recipe for faint hearted! It is a challenging and delicate procedure, involving lots of work and paying a close attention to detail. However, for those willing to face the challenge head on, that know and will appreciate the prize for their effort, please join in and enjoy the ride!
This recipe is made with simplified version of Lievito Madre, an Italian “sweet” firm sourdough starter, maintained at around 50% hydration and continuously propagated with daily refreshments. It is called “sweet” because warm propagating temperatures, above 25ºC (77ºF) create the perfect balance of acids; 4 parts lactic to 1 part acetic acid, which makes the starter less sour and ideally suited for sweet leavened pastries.
Making mature Lievito Madre is rather long and elaborate process that takes at least two weeks. This time I opted for a version that is little more acidic, but lot faster to make and still providing an outstanding leavening power. It took me 2 days to convert regular 100% hydration sourdough starter to 50% hydration, following with another day of propagating, to obtain a vigorous, stiff starter that was used for Panettone leavening.

For those that don’t have much of experience with sour dough the following will provide some clarification:
- What is 100% hydration sourdough starter?
The starter that consists of equal parts of flour and water, by weight. It is frequently called “liquid starter” due to its batter like consistency.
- What is 50% hydration stiff sourdough starter?
This is a stiffer version of sour dough starter that many recipes call for. The ratio of flour to water is 2:1, by weight.
- How do I recognize a “vigorous” stiff starter?
The starter has to be able to triple by volume every 4 hours for a total of minimum 12 hours.
Obviously, before starting anything, you need to have an active 100% hydration sourdough starter. If you don’t, it is easy to make one and info on that can be found here. For the rest of the steps just follow this recipe.
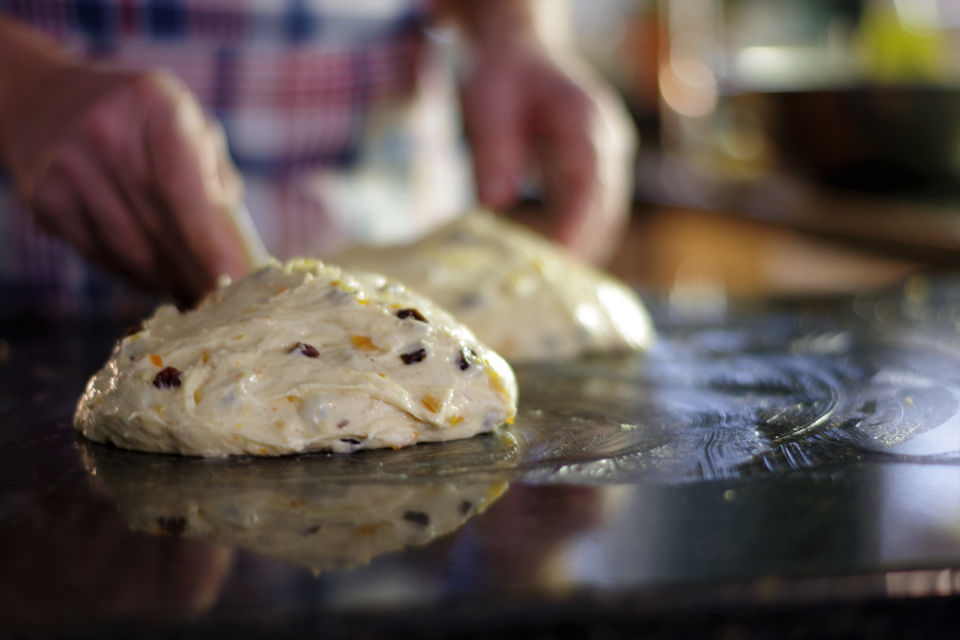
The whole process from the beginning to the end was done by hand. I don’t have a dough mixer and besides, I prefer hand kneading. Admittedly it is a challenge, it takes lots of physical power and concentration, but it can be done, and I like it. It is a rewarding first hand experience of a continuous dough change, namely, its slowly evolving elastic and shiny gluten structure, that eventually becomes strong, capable of holding all the candied fruits in suspension.

It took about 40 minutes of persistent hand kneading on Day 1 and about 60-75 minutes on a Day 2.
Another challenge was maintaining a desired dough and starter temperatures. I did it by using a cold oven as a proofing box. A thermometer placed on an oven rack and heat turned on for 30-45 seconds, brings the temperature to a desired set point of 26-28ºC. When it got hotter I cranked the door open. When it got cooler, I turned the oven lights on for 5-10 minutes or put in a pot of warm water. It worked like a charm!

Please be aware that all the steps heave to be followed accurately, without rushing. There are no shortcuts. After all you want to succeed at the end, don’t you?
When it says:”add egg yolks, sugar or butter in small increments”, that means, add the next increment only after the dough has absorbed the previous addition. Panettone is one of more challenging baking undertakings, and the failure is always real, and overarching probability, even for experienced bakers. There is a good reason for that.
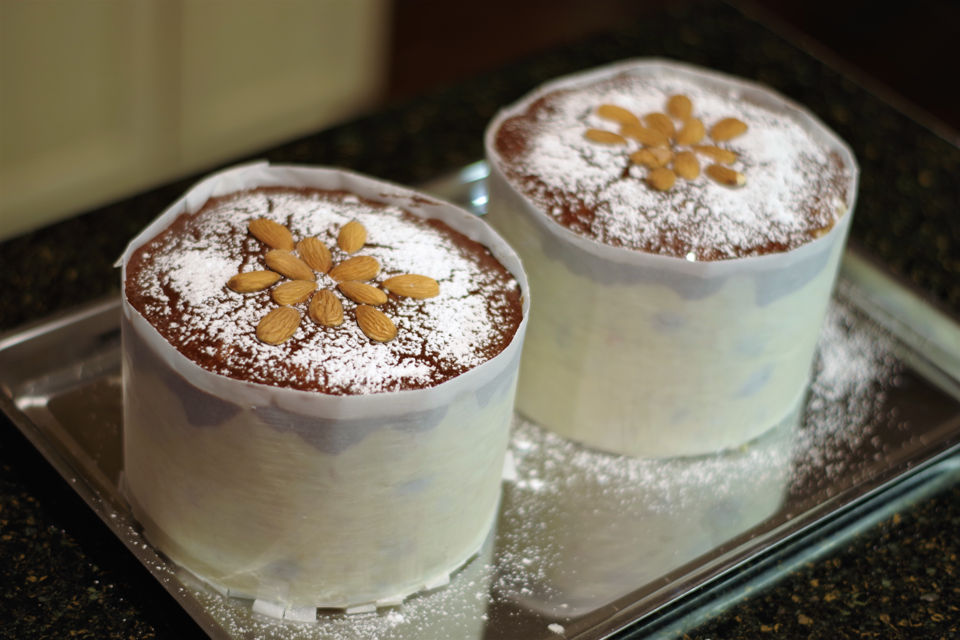
If you have a colourful panettone paper mold, that is ideal, but not necessary. For now I am still making my own; from parchment paper, glued together with adhesive, made of flour and water. Maybe it is not the prettiest, but definitely: functional, practical, inexpensive and flexible. It allows you to make any size Panettone you desire.
For this recipe I made two 6 1/4″ x 4″ paper molds for 750g panettone loafs.
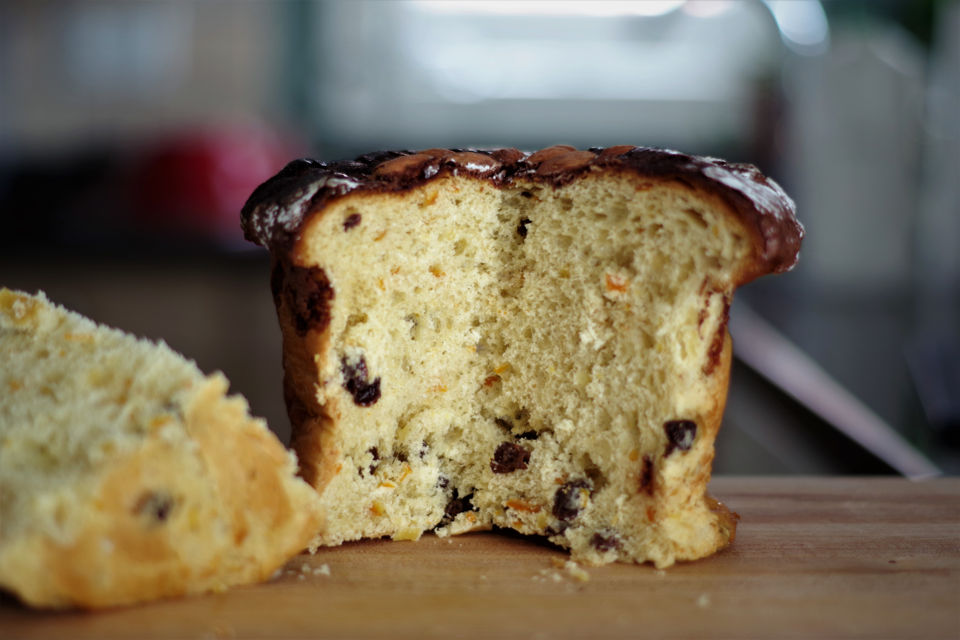
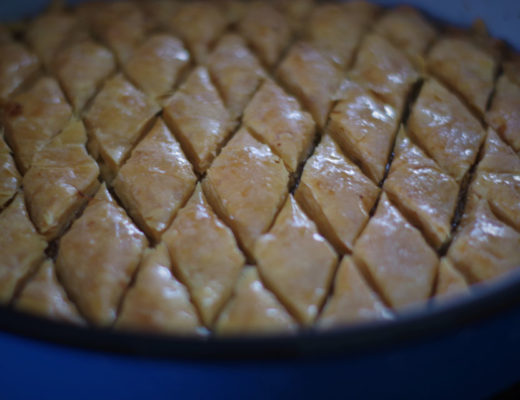
Both Panettone loafs turned out absolutely great! They were very light, soft, with fine and tender crumb, fragrant, with an amazing depth of flavour. This is perhaps the closest so far I managed to get to the “real thing”. The next step will be going through full process of developing a mature sweet Lievito Madre, and making another batch of this wonderful recipe. But that will be subject for another blog post!
The recipe has been adapted from Wild Yeast blog, with some modifications, to optimize the recipe for hand kneading.
")
| Prep Time | 3 hours |
| Cook Time | 50 minutes |
| Passive Time | 4-6 hours |
| Servings |
loaves
|
- 10 g liquid sourdough starter 100% hydration
- 20 g all purpose non bleached flour
- 10 g filtered water
- 20 g stiff sourdough starter 50% hydration
- 80 g all purpose non bleached flour divided
- 40 g filtered water divided
- 346 g all purpose non bleached flour
- 190 g filtered water room temperature
- 1/2 tsp dry active yeast
- 83 g granulated sugar divided
- 55 g egg yolk divided
- 7 g diastatic malt powder
- 83 g unsalted butter softened to room temperature, divided
- 86 g mature stiff sourdough starter
- 82 g all purpose non bleached flour
- 5 g fine sea salt
- 25 g egg yolk divided
- 1 vanilla bean scrape seeds
- 1/2 medium size orange orange zest
- 114 g filtered water divided (40ml;37ml;37ml)
- 82 g granulated sugar divided
- 126 g unsalted butter softened to room temperature, divided
- 19 g honey
- 126 g raisins
- 44 g candied lemon peel
- 126 g candied orange peel
- all of the first dough
- 73 g granulated sugar
- 5 g ground almonds
- 6 g vegetable oil
- 6 g corn flour
- 6 g unsweetened cocoa powder
- 30 g egg whites
- 10 g vanilla sugar
- 2 6 1/4" Panettone paper molds
- 4 bamboo skewers
Ingredients
Converting Liquid Sourdough Starter to Stiff Sourdough Starter
Mature Stiff Starter
Day 1: First Dough
Day 2: Final Dough
Glaze (optional)
Toppings (optional)
Special Supplies
|
|
- In a small bowl stir together 10g of liquid starter, 20g of flour and 10g of filtered water. Cover the bowl with plastic wrap and keep at room temperature for 12 hours.
- Discard half of the mixture. Add in and stir thoroughly: 20g of flour and 10g of filtered water. Cover and keep at room temperature for 12 hours.
- The following day repeat the same process, by refreshing the starter, once every 12 hours. Within 12 hours cycle, the starter should at least double by volume, without collapsing, before the following feeding. Keep repeating this cycle until such starter is obtained.
- In a small bowl mix together 20g of stiff starter, 20g of flour and 10g of filtered water. Cover and keep at 29ºC (85º F) for 4 hours.
- Discard all but 20g of starter and re-feed again with 20g of flour and 10g of filtered water. Cover and keep at 29ºC (85º F) for another 4 hours.
- Keep re-feeding process going until the starter triples in size between feedings. This may take only two consecutive feedings, as it was in my case, or it may take couple of days. If doing more than one day, you don't need to schedule middle of the night feedings. Just give it a larger feeding, reduce the temperature to approximately 26ºC (80º F) before leaving it for an 8 hour night.
- Once the starter tripled in size, make the last feeding by discarding all but 40g of starter, and mix it with 40g of flour and 20g of filtered water.
- Scale the amount of starter needed for the first dough 4 hours after the final feeding.
- In a medium size mixing bowl dissolve dry yeast in a water. Add flour, diastatic malt powder and mature stiff starter, knead for about 5-8 minutes.
- Add egg yolk in (3-4) small increments and each time knead until is fully absorbed by the dough.
- Add sugar in (5-6) small increments and each time knead until is fully absorbed by the dough.
- Add softened butter in small increments, each time knead until is fully absorbed by the dough.
- Transfer the dough in a large, lightly oiled mixing bowl. Cover and ferment at 22ºC (72ºF) for 12 hours or until the dough is more than tripled by volume.
")
- Sprinkle over the first dough: flour, salt, scraped vanilla seeds, orange zest and pour in 40 ml of filtered water. Knead until fully combined, about 5 minutes.
- Add egg yolk in 2-3 small increments and each time knead until is fully absorbed by the dough.
- Add sugar in 5-6 small increments and each time knead until is fully absorbed by the dough. Keep kneading until the dough starts pulling off from the sides of the bowl. This will indicate that gluten is near its full development.
- Slowly add butter in small increments and each time knead until the dough absorbs it completely. Gluten will be fully developed with the last incremental addition.
- Add honey and 37g of filtered water. Knead until is fully incorporated in the dough.
- Add 37g of filtered water and knead until incorporated.
- Add raisins, candied orange peel, candied lemon peel and knead until evenly distributed, 3-4 minutes.
")
- Transfer the dough in the lightly oiled bowl, cover and ferment at 22ºC (72ºF)for 1 hour. Stretch and fold the dough once, after the first 30 minutes. If the dough is very loose fold it twice: after 20 minutes, and then again after 40 minutes.
- Turn the dough on a buttered surface, weigh and divide, form a loose ball of each part, let rest for 20 minutes. You do not need to cover the balls.
- Insert two parallel bamboo skewers close to the bottom of each 6 1/4" x 4" paper mold.
- Form two tight dough balls and insert them into paper molds.
- Proof at 26ºC (80ºF) for 4-6 hours or until the top of dough dome is even with the paper mold. The sides of the dough will be about 1" from the top of paper mold. The molds don't need to be covered.
")
- Preheat conventional oven (fan assist is off) to 176ºC (350ºF), rack in the lower 1/3 of the oven.
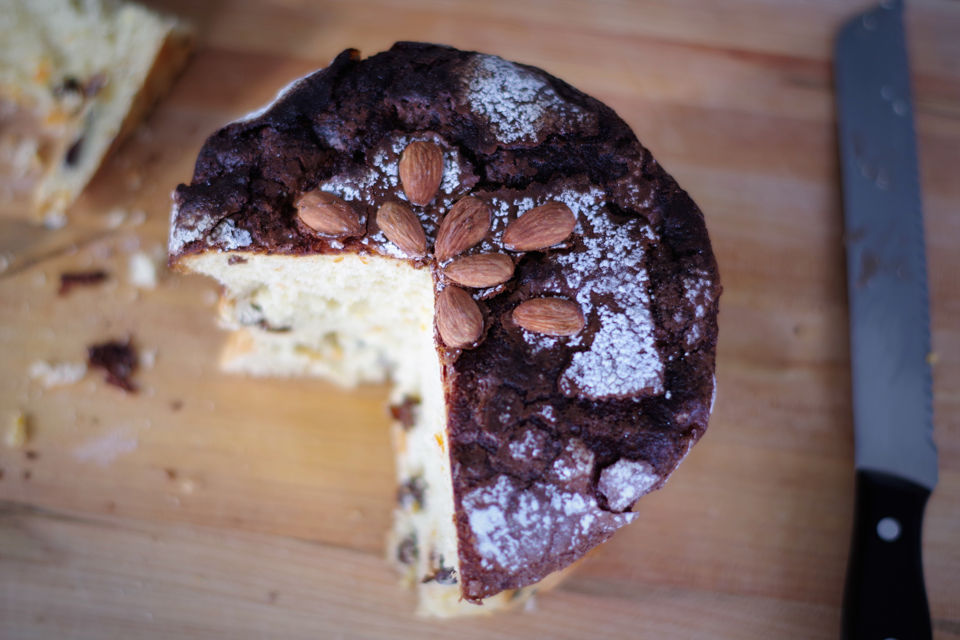
- Optionally glaze the loaves, following with generous dusting with confectioners sugar and garnish with the whole almonds.
- Bake for 50 minutes or until internal temperature reaches 85ºC (185ºF).
- As panettone is being baked prepare holders for baked panettone skewers.
- When panettone loaves are baked, hung them upside down immediately, and place them in the holders. Let it cool overnight.
")
- Keep each loaf in a plastic bag to preserve freshness and fragrance.
- Enjoy heavenly fruits of your labour!
")
- soften the butter by keeping it overnight covered on a kitchen counter.
- use a small 250 ml Mason jar to verify the first dough rise overnight. Put in the jar a small amount of the dough, about 1/3 of the jar volume. Cover with plastic wrap and keep together with the first dough bowl. When the jar is full, the first dough fermentation is complete.
- knead approximately 3-5 minutes between each incremental addition of either egg yolk, sugar or soft butter.


No Comments