

I love to bake bread. Just the thought of this little adventure makes me feel good. A number of things are taking place, beginning with the ritual of carefully measuring and mixing of all of the ingredients. At the same time an anticipation is slowly building up on a creation that I have embarked upon. In my head I am planing the next activity but with no rush. One step at a time. The whole process of making bread is as much fun as tasting the end result, a wonderful freshly baked loaf.
The one thing I am sure of is, you got to appreciate the flavor and goodness of that loaf or otherwise you simply will not do it. Why would you? You can as easily buy one for $2.50 or $3.00 at your favorite grocery store, no sweat. If that’s what you think, fine, go for it. But, if you’re in a different crowd, used to having a fresh handcrafted bread at your table, and you truly enjoy it, you will take on the challenge. Once you are hooked and in love with your bread you will do whatever it takes to have it. No different than any other form of love.
An electric mixer could be helpful to speed things up but I genuinely enjoy direct contact with the ingredients in the process, the silky softness and coolness felt with my fingers immersed in the flour. Adding the water to the mix brings in a new compliment, releasing a pleasant nutty aroma. Sticky mass is enrobing my hands. I gently swirl everything around the mixing bowl in attempt to have it all incorporated in one compact mass. Kneading is next, and that is a special pleasure. Using your hands to transform a shaggy mass into a soft, elastic, smooth and beautifully smelling dough is a wonder that you got experience to appreciate.
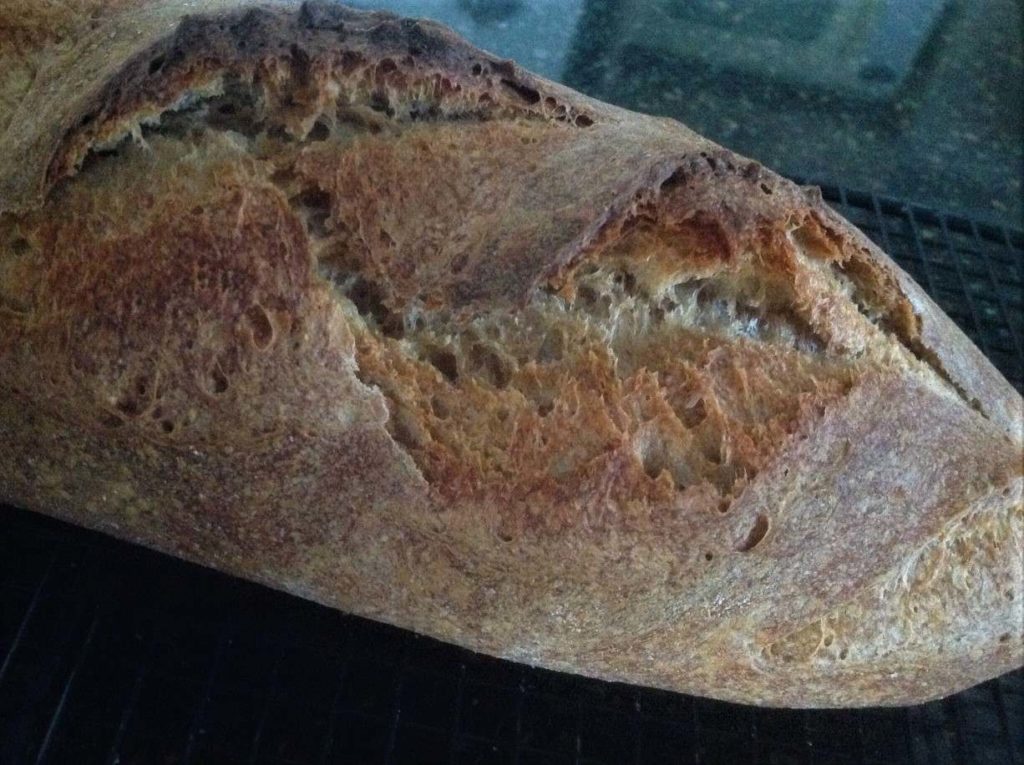
Once the bread loaf is in the oven, an uplifting scent of fresh bake spreads throughout the house. As the crackling loaf lands on a cooling rack, admiring its shape and color I take a deep breath. Oh man, what a smell, makes me feel so grateful and humble.
Time to let the flour dust fly and make the kitchen dirty, again.
The artisan bread I am making today may seem complicated but it is not. Most of the work is in the waiting, how difficult is that? The only thing is: you need to be at home for most of the day. So if you plan to be around, do some house chores, along the way you can bake this bread. It will just happen like magic.
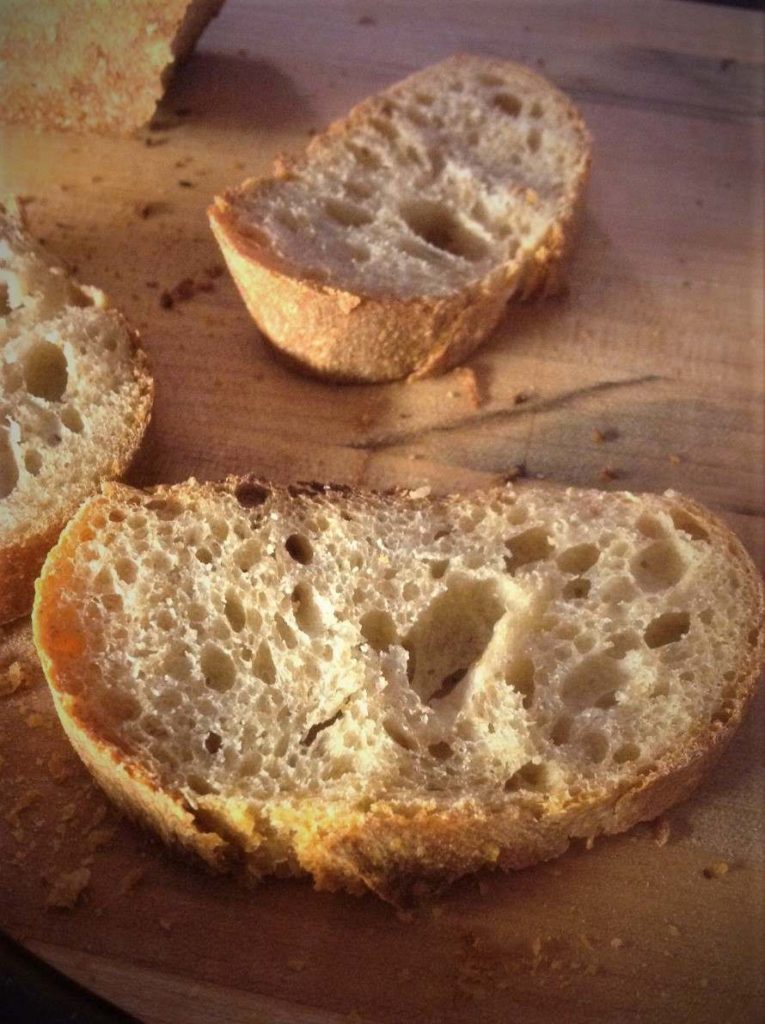
Once taken out of the oven, let it cool for couple of hours and then try it with some hard cheese or butter. Drop me a line then and let me know what you think?
Related posts and Recipes : Simple Sourdough Starter

| Prep Time | 50 minutes |
| Cook Time | 40 minutes |
| Passive Time | 20 hours |
| Servings |
loaves
|
- 30 g sourdough starter refreshed 8-12 hours before
- 95 g water lukewarm
- 150 g unbleached bread flour
- 600 g unbleached bread flour
- 55 g whole wheat flour finely ground
- 15 g whole rye flour finely ground
- 20 g wheat germ toasted
- 20 g Barley malt syrup
- 450 g water warm
- levain
- 16 g salt
Ingredients
Levain - poolish starter
Dough
|
|
- Dissolve the sourdough in the water.
- Add the flour and knead the dough until very smooth.
- Place in a covered container and let it ferment for 8-12 hours, overnight, at room temperature.
- Combine all three flours and the wheat germ in a large bowl.

- Measure the malt in an oiled tablespoon and dissolve it in the lukewarm water.
- Pour the malted water over the flour mixture and mix with the hands until all ingredients are combined.
- Cover with plastic wrap and let rest for 30 minutes. This stage is called autolyse and the idea is to get the dough fully hydrated which will make it easier to handle and will require less kneading time.
- Turn the dough out onto the work surface, add levain and salt.
- Knead the dough until is very smooth, about 10 minutes. The primary function of kneading is to develop gluten in the dough. The gluten, wheat protein, is what will provide a structure that will trap carbon dioxide produced by yeast and give the strength to loafs to preserve their shape during and after baking.
- Place the dough in a large container and cover tightly with the plastic wrap. Let ferment for 1 hour at room temperature. In a bakers world, this phase is called the first rise.
- Turn the dough out to the work surface and stretch and fold the dough once.
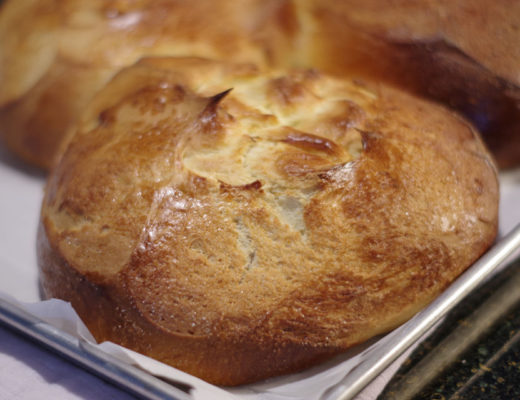
- Return the dough to the container, cover with plastic wrap. Let it ferment another 3-5 hours until dough is well expanded but not yet doubled in bulk. Don't get confused here, doubling in volume for boule (dough half ball shape) is increasing its height by only about 20%. For example a boule 10 cm high approximately doubled in size at 12 cm height.
- Dust the work surface and turn the dough out.
- Cut the dough in half, each piece will be approximately 690 grams.
- Lightly round the pieces, cover them loosely with plastic wrap and let rest for 10-15 minutes.

- Shape the dough into batards that are about 25 cm (10") long. Place them in a well floured kitchen towel, seam side down. Cover the loaves with the plastic wrap and leave at room temperature for 3.5 - 4.5 hours. This phase is called proofing and it is the second and final rise. How long it will take deepens on temperature and humidity in your kitchen. Generally, loaves will expand 1.5-2 times of their original size. How do you know your loaves are proofed and ready for oven? After you observed that loaves are inflated to the right size lightly press your floured finger into the dough. Your finger print should spring back slowly to about half of the print depth. If it completely comes back, the dough is under proofed and you can wait a little longer. If in doubt it is better to under-poof than over proof the loaves. Why? Over proofing will cause the weakening of gluten structure which will not be able to hold amount of carbon dioxide produced by the yeast. The result will be dough deflating and collapsing. The loaves are over proofed when finger print does not spring back.

- Place the baking stone on the middle rack. Preheat the oven to 220°C (425°F) for a minimum 45 minutes before the end of proofing. A baking stone is critical for home baking. Hot, it is a thermal mass that will prevent the loss of temperature when cold dough is placed in the oven. Higher starting temperature will provide better oven spring or increase in bread volume during the baking.
- Use a sharp knife or a razor blade to slash each loaf about 5 times. The depth of cut is approximately 5 mm (1/4") and blade should be kept at about 30° angle up from horizontal plane. Each slash will start at the middle of the last one, other wards it will overlap . Slashes are slightly angled, almost vertical and they will be placed within an imaginary band that is about 1/3 of loaf width. With slashing, you control where the bread crust will open. It becomes easier with the practice. Don't sweat if it doesn't look perfect.
- Cut two pieces of parchment paper, each one longer and wider than expanded loaf.
- Use a floured wooden board to gently transfer loaves to the parchment paper. I use a simple 5 mm (1/4") plywood board lined with the parchment paper.
- Slide loaves on the paper onto the hot stone and quickly spray them with misted water from a spray bottle. Spray also the side walls of the oven and the baking stone.
- Bake for 35-40 minutes. The breads are baked when they are dark and evenly browned.
- Let the breads cool on a rack.
Recipe is adapted from the book "Artisan Baking Across America" by Maggie Glezer.

No Comments