
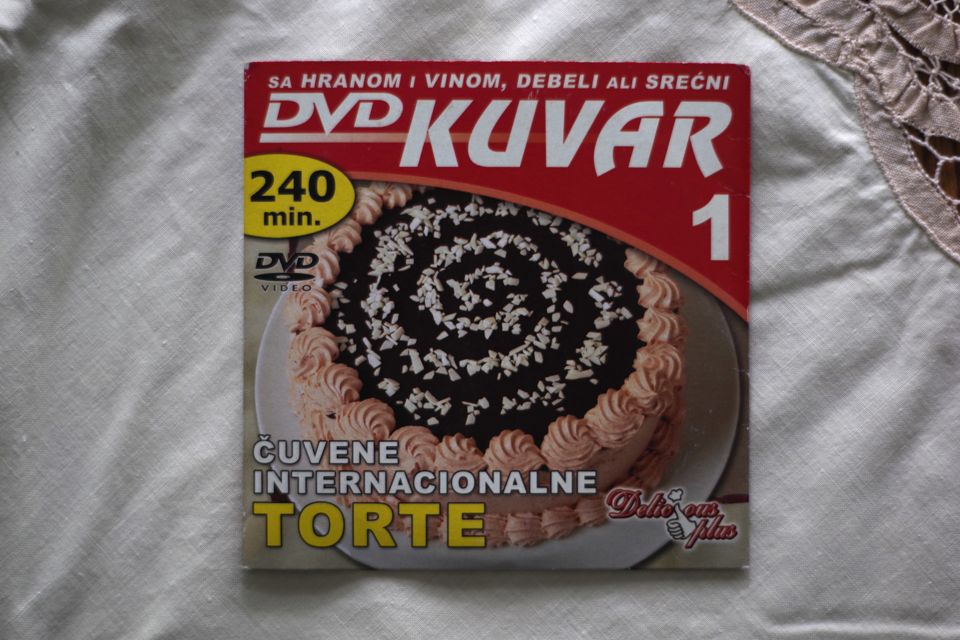
I baked this torte for my wife’s birthday, that was her birthday wish! The recipe is from a DVD with torte recipes that we got about 20 years ago as a present from my late mother in law. Every once in a while I would review these recipes, but yet this is the first time I actually baked one. It was quite an enjoyable afternoon going through routine steps of crafting this well known cake. As usual there was background music to set the mood and motivation!
Žerbo Torta is a cake of Hungarian origin that is widely liked and well known throughout Balkans. I am familiar with that and also that the cake had a reputation of being challenging to make. This is disputable as I found it comparable to the baking process of most of the other tortes that I have made and that are from this geographic area. The recipe brought a smile to my face as it starts with 10 eggs! There was saying back home that you can’t go wrong with the torte whose recipe includes 10 eggs, 300g butter and 500g of ground walnuts! This is almost something like a folk generic torte recipe and is pretty well right on the money! Zerbo recipe almost meets that criteria except walnuts are substituted with almonds.
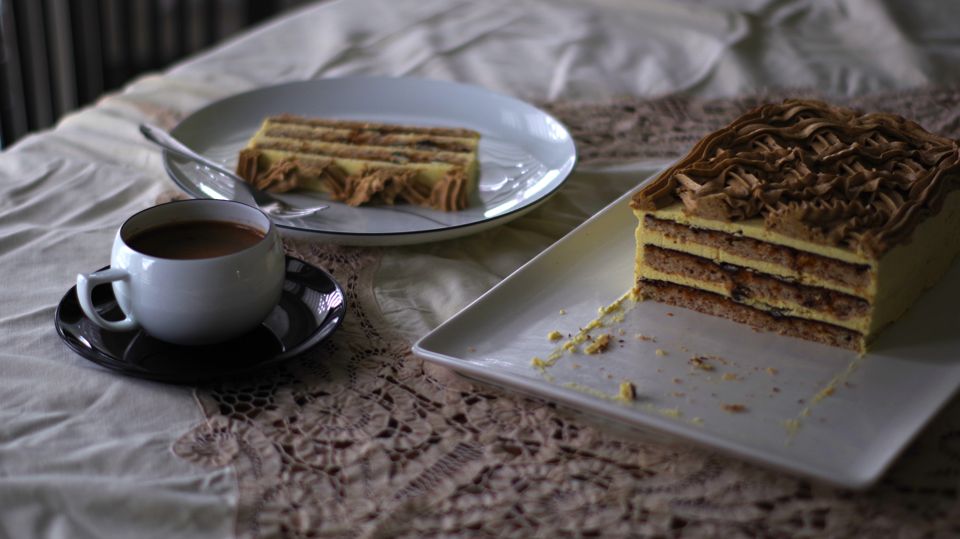
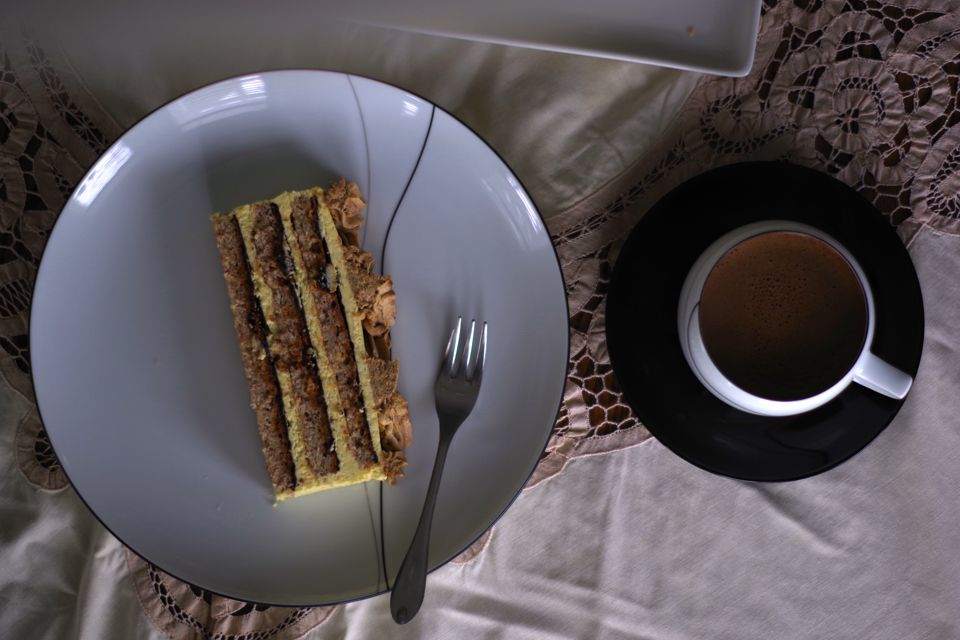
The cake was very successful and well liked as our guests prized its rich and buttery taste! To me it was one of those aha moments after I had a first bite! It evoked memories of the taste that closely corelated with homemade tortes that were customarily brought to wedding parties and family slava celebrations that I attended in my childhood! What a wonderful feeling that was! Times of wedding parties where each attending family besides other presents was obligated to bring a freshly baked homemade torte. Now can you imagine a party of several hundred guests where dozens upon dozens of home baked tortes, as a rule walnut and almond based recipe variations were lined on guest’s tables? The tortes were displayed on glass pedestals, with imaginative variety of decorating options. Those were the times, a colorful scene to experience! That is the taste engrained in my memory that I found in this recipe!
The recipe says that 90 min is a total required baking time, I would say reserve a good afternoon to do it from start to finish. I mean it doesn’t take that much of active work but nevertheless by the time you go through all the baking and cooling off cycles in the recipe steps, several hours will go by. However, it is well worth it and I am sure I will be baking it again!

| Prep Time | 30 min |
| Cook Time | 25 min |
| Passive Time | 2 hr |
| Servings |
servings
|
- 10 egg whites large eggs
- 8 tbsp granulated sugar
- 400 g ground almonds
- 3 tbsp all purpose non bleached flour
- 10 egg yolks large eggs
- 500 ml organic milk
- 10 tbsp granulated sugar
- 2 tbsp cream of wheat
- 300 g butter softened at room temperature
- 6 tbsp confectioner's sugar
- 150 g granulated sugar
- 50 g butter softened at room temperature
Ingredients
Cake
Buttercream
Caramel Glaze
Chocolate Glaze
|
|
- Using a pastry brush, brush a medium size baking pan 12"x16.5" (30cmx 41cm) with vegetable oil and line with parchment paper.
- Preheat the oven to 150°C (302°F), rack in the middle.
- Break and separate 10 large eggs. Egg whites in one large mixing bowl, egg yolks into another medium size mixing bowl.
- Using a hand held or standing mixer, mix egg whites to soft peaks. Slowly add 8 tbsp of sugar and mix to stiff peaks.

- Stir flour into ground almonds.
- Transfer the mixed egg whites to a large bowl. Add ground almond mixture in two parts and gently fold in by using a large silicone spatula.
- Spread the mixture evenly on a baking pan, use an offset metal spatula to even out.
- Bake for 25 minutes or until edges of the cake start to brown, the middle springs back when lightly pressed.
- Let it cool off completely.
- Prepare double boiler with two medium sized pots. Heat the water to boil and then reduce heat to low.
- In a medium size mixing bowl, using a hand held mixer at medium speed mix together just until unified: egg yolks, milk, sugar and cream of wheat.
- Transfer the mixture to double boiler and cook until the custard thickens up, stir constantly with whisk or heat resistant silicone/wooden spatula.
- Remove from heat, place the cling wrap film on top of the custard to prevent skin forming, let cool completely.
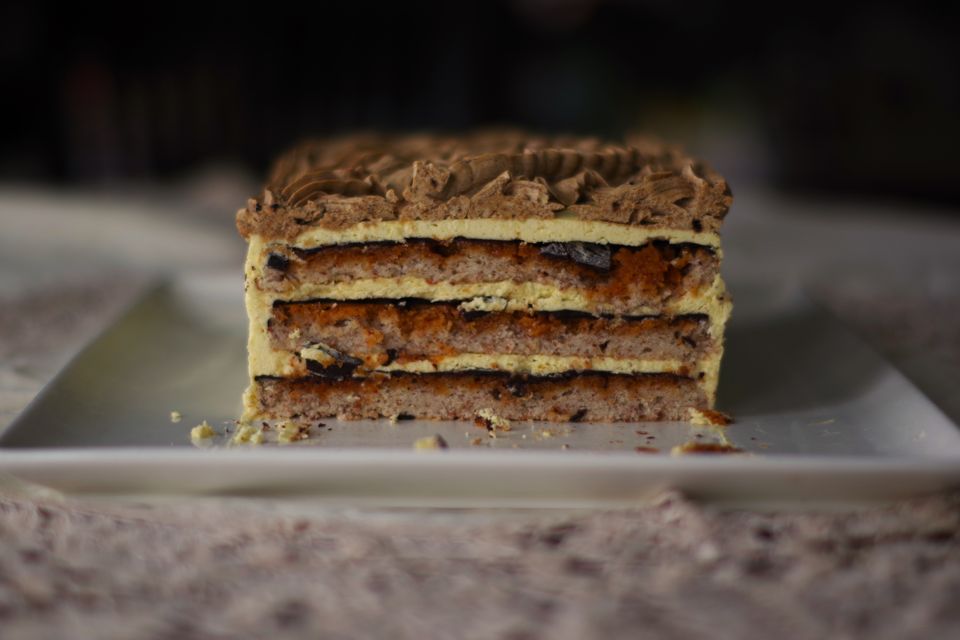
- Remove baked cake from a baking pan. Turn it upside down and peel off the parchment paper.

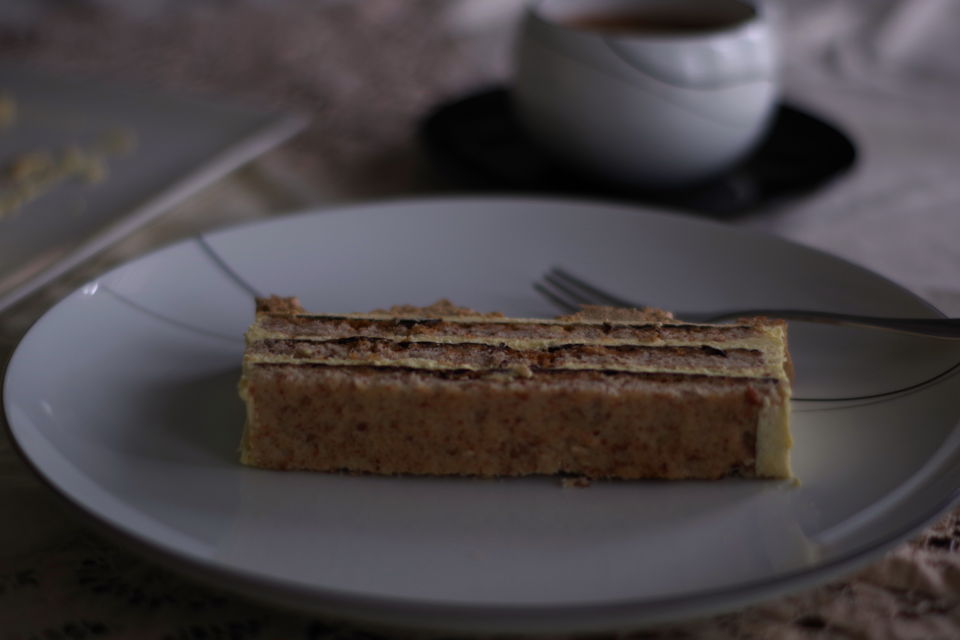
- Divide the cake into 3 equal rectangular shapes, about 12" long and 5.5" wide. For easier application line the edge of the kitchen counter with all 3 pieces, side by side, by length.

- Add 150 g of sugar to a medium size pan and melt over medium heat (5 out of 10). Stir occasionally and cook until umber brow color is obtained. Stir in 50g of butter, take off the heat.

- Using a wooden spoon or heat resistant silicone spatula quickly spread evenly across the each cake piece. Work fast before caramel hardens up!

- Over double boiler melt 150g of chocolate, let it cool off slightly. As it starts thickening up use an offset spatula to evenly coat each cake piece. Place coated cake pieces in a refrigerator for 1/2 hour to speed up hardening of chocolate.

- Using a stand mixer at medium speed beat softened butter and confectioners’ sugar until fluffy and silky smooth.

- At low speed adding few spoons at the time add the custard to the butter mixture. Mix until uniform and fully incorporated.
- Place the first cake piece on a rectangular serving dish, chocolate coated surface up. Add about 3 large table spoons of butter cream on top and spread evenly by using an offset spatula.
- Top it up with another cake piece, chocolate coated surface up and spread another layer of butter cream.
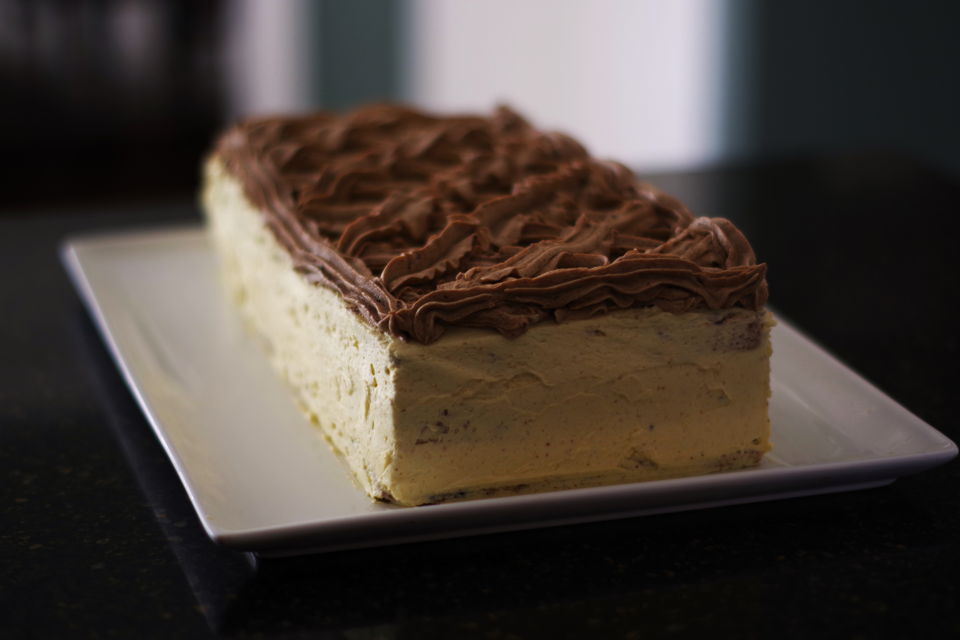
- Top it up with the last cake peace, chocolate side up and evenly spread buttercream on the top. Using an offset spatula spread the butter cream and coat all 4 sides of the torte.

- Add 1 tbsp of Nescafe to remaining buttercream and stir until unified.
- Fill the pastry bag fitted with small to medium size star tip, decorate the cake top by drawing parallel lines at 45 degrees. You can also add a decorating line around the cake perimeter and even cake base if you wish (I ran out of cream so abandoned the last part).

- Keep refrigerated and store up to a week!


No Comments